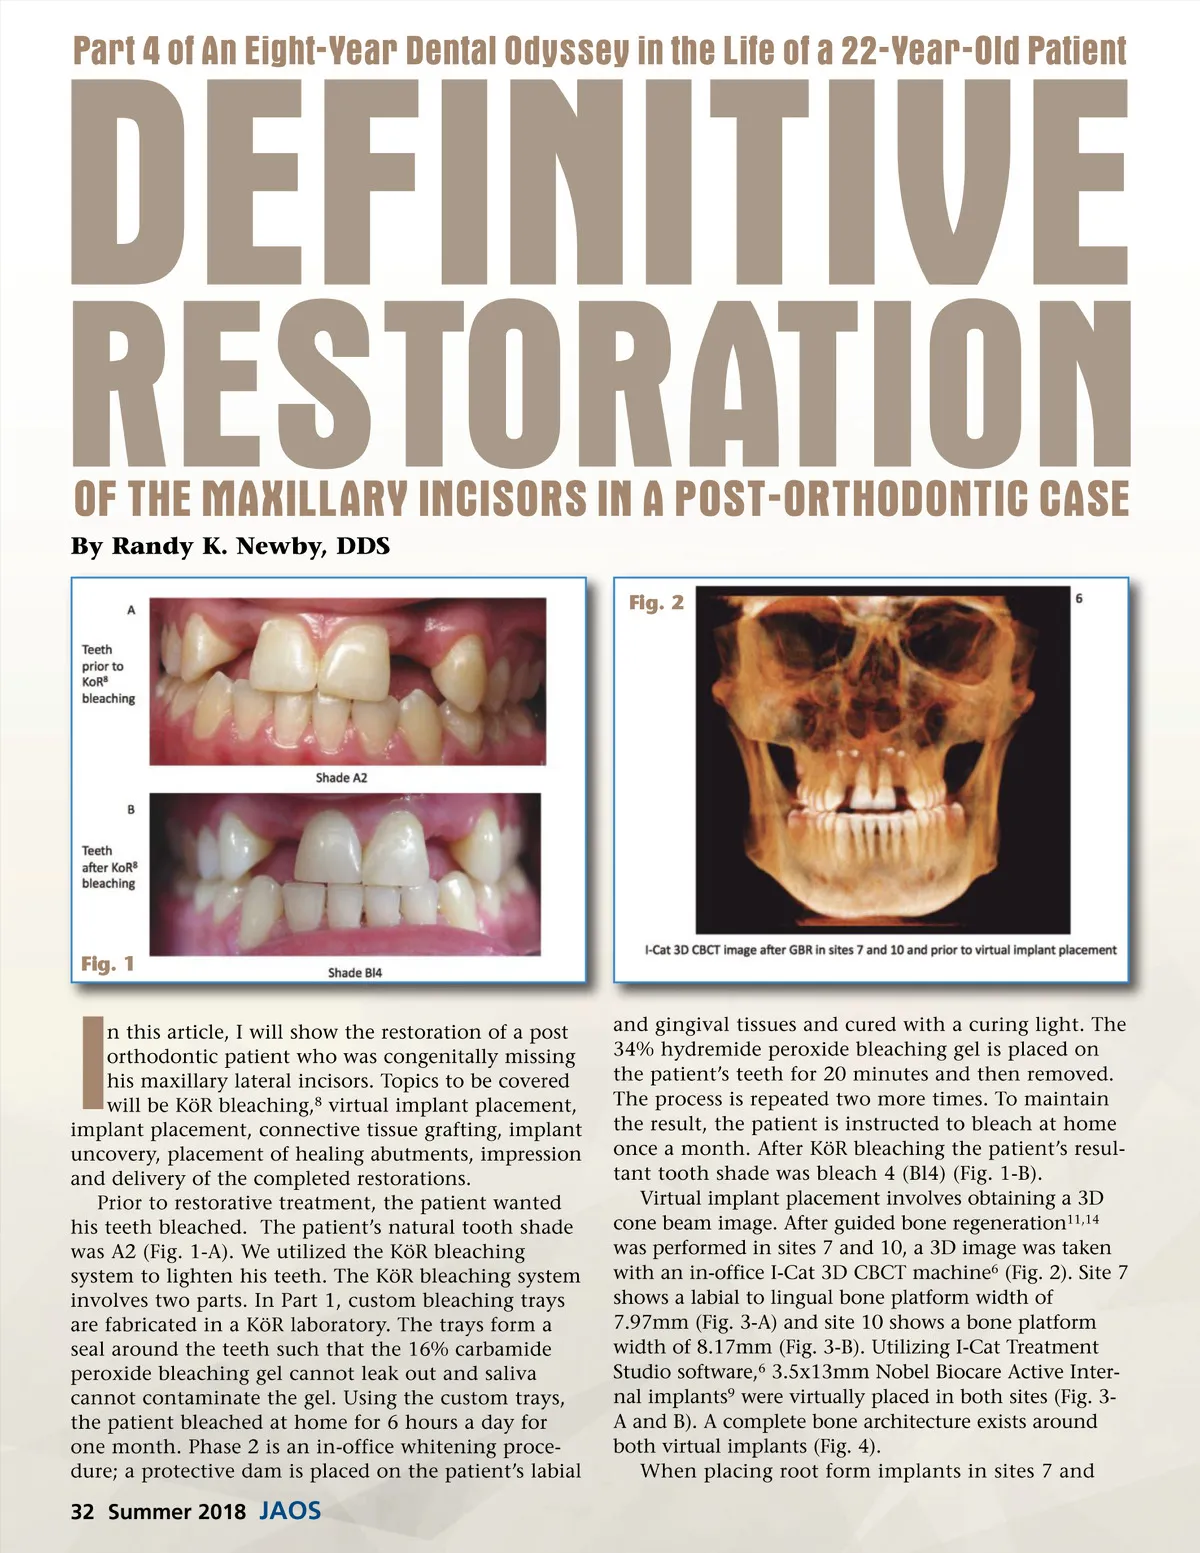
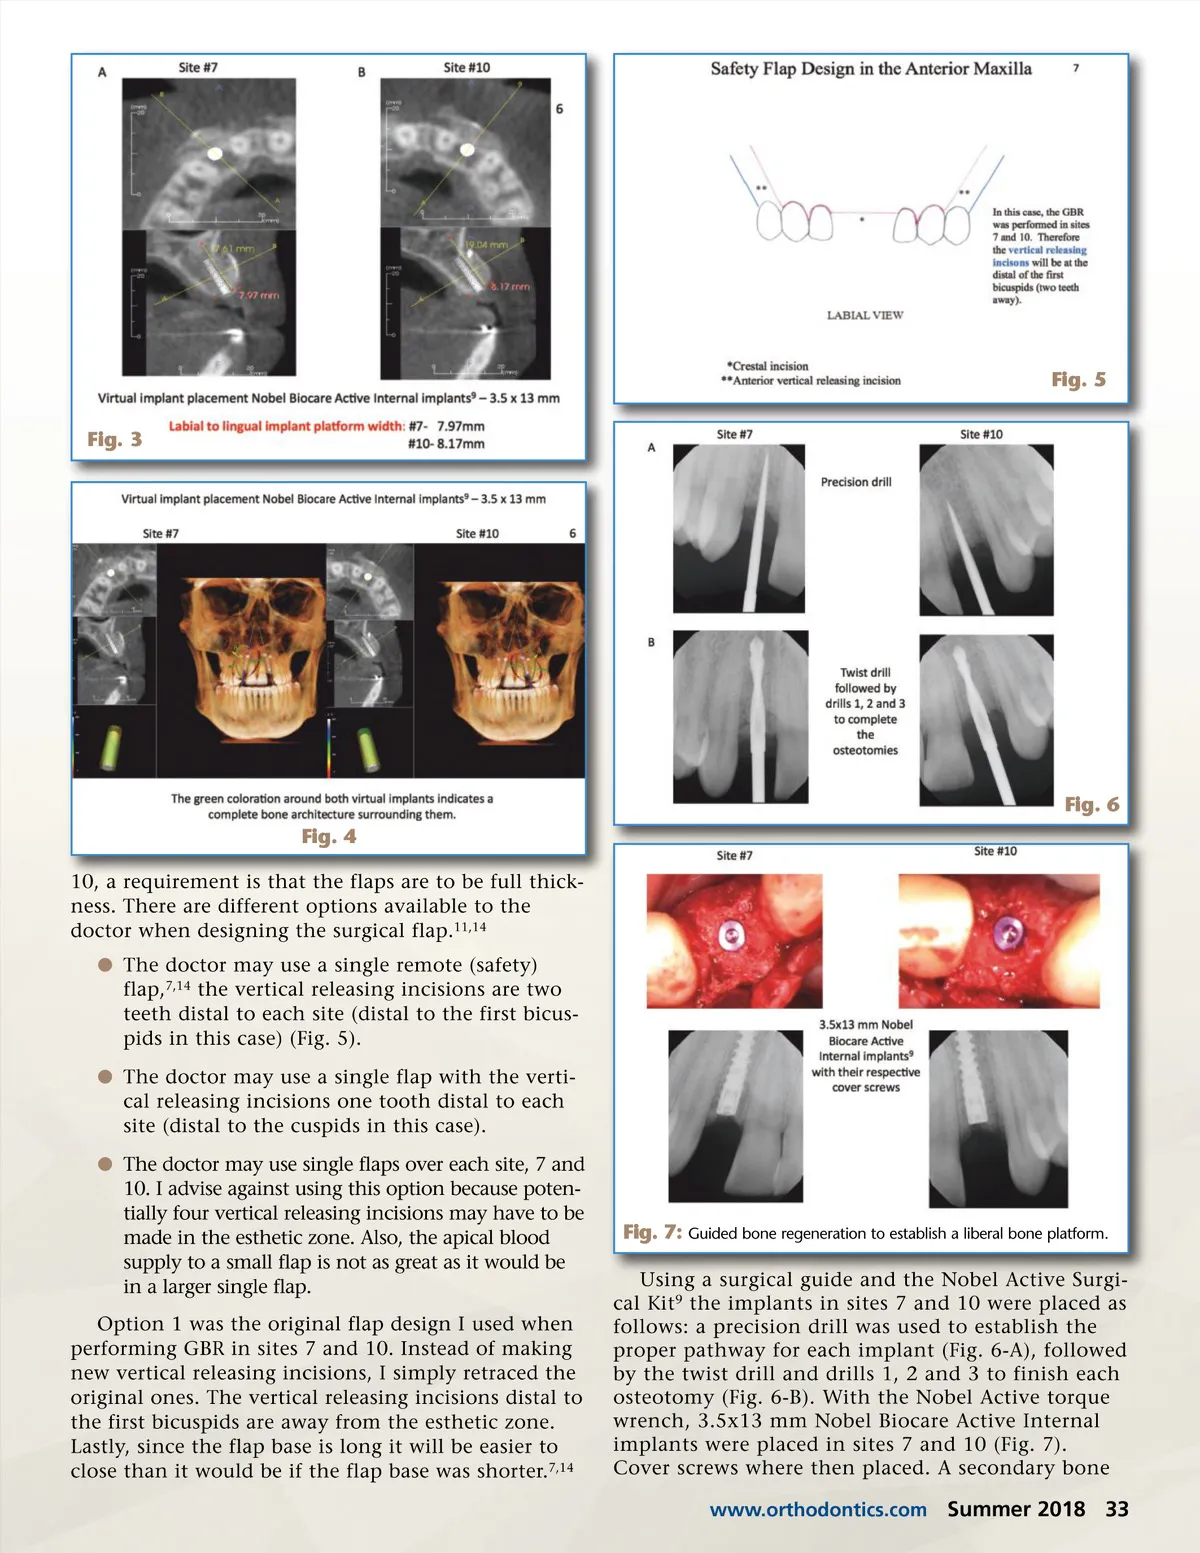
Fig. 5 Fig. 3 Fig. 6 Fig. 4 10, a requirement is that the flaps are to be full thick-ness. There are different options available to the doctor when designing the surgical flap. 11,14 b The doctor may use a single remote (safety) flap, 7,14 the vertical releasing incisions are two teeth distal to each site (distal to the first bicus-pids in this case) (Fig. 5). b The doctor may use a single flap with the verti-cal releasing incisions one tooth distal to each site (distal to the cuspids in this case). b The doctor may use single flaps over each site, 7 and 10. I advise against using this option because poten-tially four vertical releasing incisions may have to be made in the esthetic zone. Also, the apical blood supply to a small flap is not as great as it would be in a larger single flap. Option 1 was the original flap design I used when performing GBR in sites 7 and 10. Instead of making new vertical releasing incisions, I simply retraced the original ones. The vertical releasing incisions distal to the first bicuspids are away from the esthetic zone. Lastly, since the flap base is long it will be easier to close than it would be if the flap base was shorter. 7,14 Fig. 7: Guided bone regeneration to establish a liberal bone platform. Using a surgical guide and the Nobel Active Surgi-cal Kit 9 the implants in sites 7 and 10 were placed as follows: a precision drill was used to establish the proper pathway for each implant (Fig. 6-A), followed by the twist drill and drills 1, 2 and 3 to finish each osteotomy (Fig. 6-B). With the Nobel Active torque wrench, 3.5x13 mm Nobel Biocare Active Internal implants were placed in sites 7 and 10 (Fig. 7). Cover screws where then placed. A secondary bone www.orthodontics.com Summer 2018 33
Journal of the American Orthodontic Society Summer 2018/Buyer's Guide: Page 33