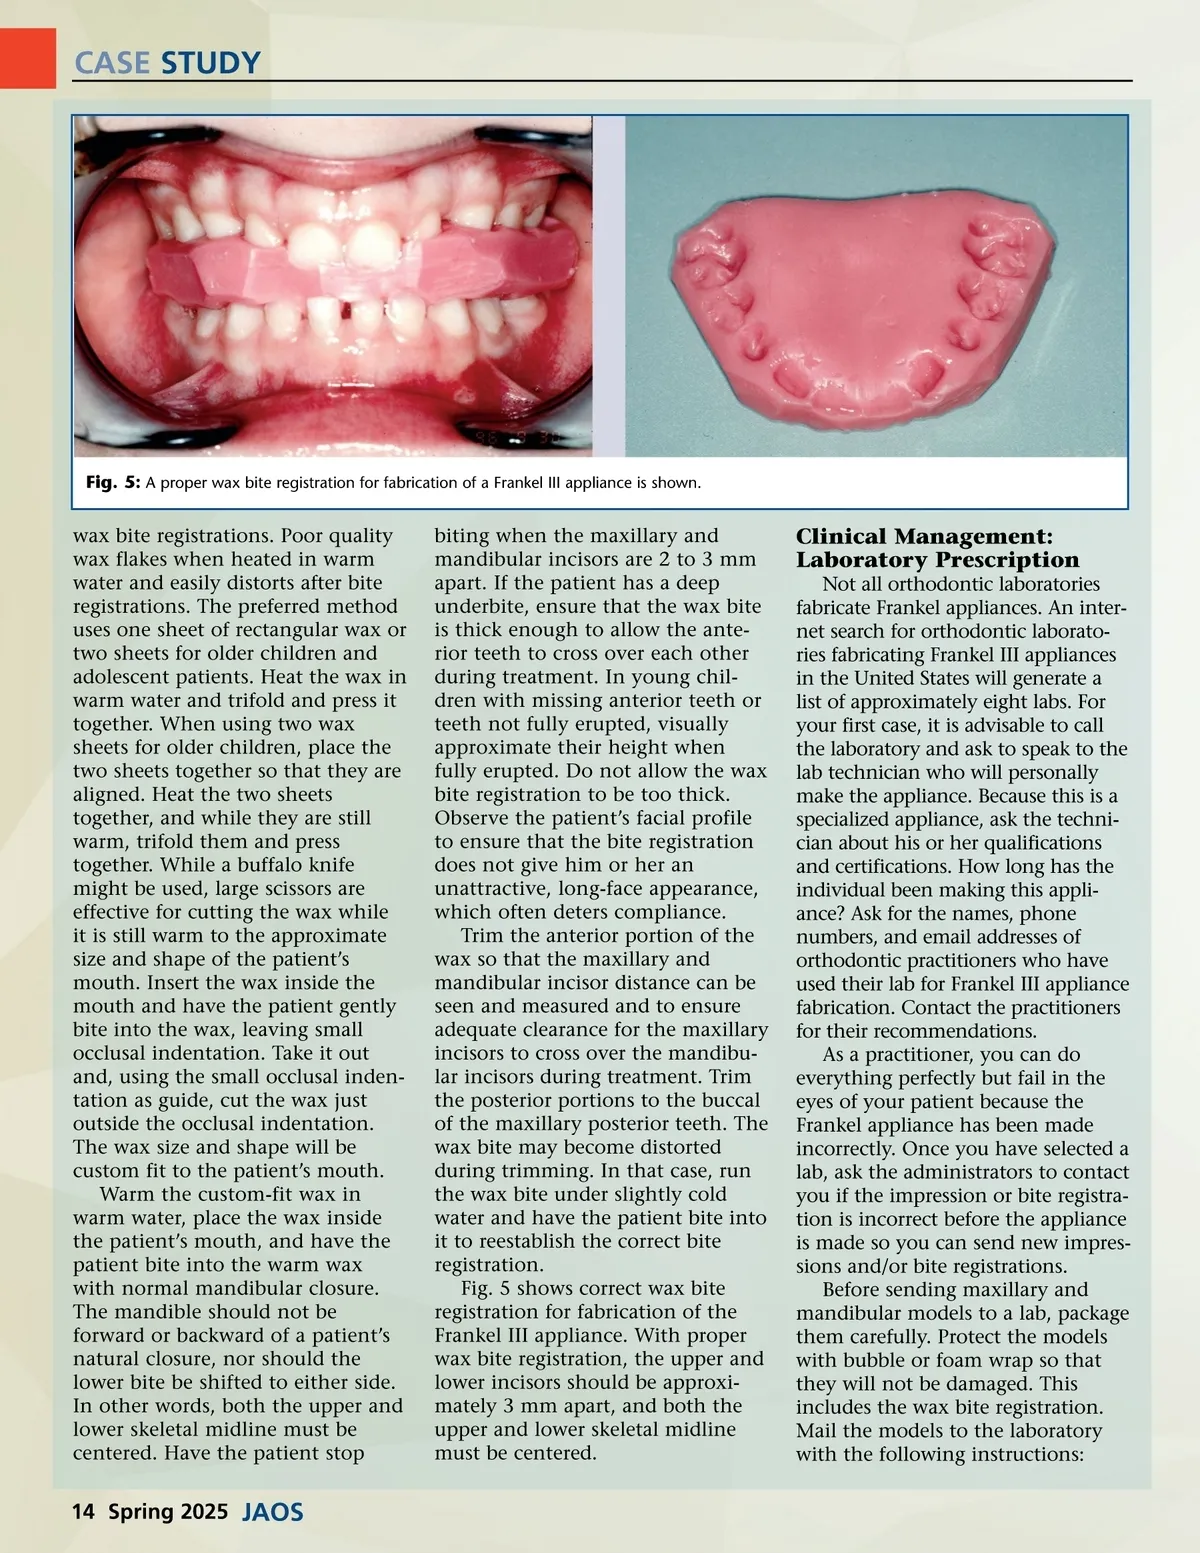
CASE STUDY Fig. 5: A proper wax bite registration for fabrication of a Frankel III appliance is shown. wax bite registrations. Poor quality wax flakes when heated in warm water and easily distorts after bite registrations. The preferred method uses one sheet of rectangular wax or two sheets for older children and adolescent patients. Heat the wax in warm water and trifold and press it together. When using two wax sheets for older children, place the two sheets together so that they are aligned. Heat the two sheets together, and while they are still warm, trifold them and press together. While a buffalo knife might be used, large scissors are effective for cutting the wax while it is still warm to the approximate size and shape of the patient’s mouth. Insert the wax inside the mouth and have the patient gently bite into the wax, leaving small occlusal indentation. Take it out and, using the small occlusal inden-tation as guide, cut the wax just outside the occlusal indentation. The wax size and shape will be custom fit to the patient’s mouth. Warm the custom-fit wax in warm water, place the wax inside the patient’s mouth, and have the patient bite into the warm wax with normal mandibular closure. The mandible should not be forward or backward of a patient’s natural closure, nor should the lower bite be shifted to either side. In other words, both the upper and lower skeletal midline must be centered. Have the patient stop biting when the maxillary and mandibular incisors are 2 to 3 mm apart. If the patient has a deep underbite, ensure that the wax bite is thick enough to allow the ante-rior teeth to cross over each other during treatment. In young chil-dren with missing anterior teeth or teeth not fully erupted, visually approximate their height when fully erupted. Do not allow the wax bite registration to be too thick. Observe the patient’s facial profile to ensure that the bite registration does not give him or her an unattractive, long-face appearance, which often deters compliance. Trim the anterior portion of the wax so that the maxillary and mandibular incisor distance can be seen and measured and to ensure adequate clearance for the maxillary incisors to cross over the mandibu-lar incisors during treatment. Trim the posterior portions to the buccal of the maxillary posterior teeth. The wax bite may become distorted during trimming. In that case, run the wax bite under slightly cold water and have the patient bite into it to reestablish the correct bite registration. Fig. 5 shows correct wax bite registration for fabrication of the Frankel III appliance. With proper wax bite registration, the upper and lower incisors should be approxi-mately 3 mm apart, and both the upper and lower skeletal midline must be centered. Clinical Management: Laboratory Prescription Not all orthodontic laboratories fabricate Frankel appliances. An inter-net search for orthodontic laborato-ries fabricating Frankel III appliances in the United States will generate a list of approximately eight labs. For your first case, it is advisable to call the laboratory and ask to speak to the lab technician who will personally make the appliance. Because this is a specialized appliance, ask the techni-cian about his or her qualifications and certifications. How long has the individual been making this appli-ance? Ask for the names, phone numbers, and email addresses of orthodontic practitioners who have used their lab for Frankel III appliance fabrication. Contact the practitioners for their recommendations. As a practitioner, you can do everything perfectly but fail in the eyes of your patient because the Frankel appliance has been made incorrectly. Once you have selected a lab, ask the administrators to contact you if the impression or bite registra-tion is incorrect before the appliance is made so you can send new impres-sions and/or bite registrations. Before sending maxillary and mandibular models to a lab, package them carefully. Protect the models with bubble or foam wrap so that they will not be damaged. This includes the wax bite registration. Mail the models to the laboratory with the following instructions: 14 Spring 2025 JAOS
Journal of the American Orthodontic Society Spring 2025: Page 14