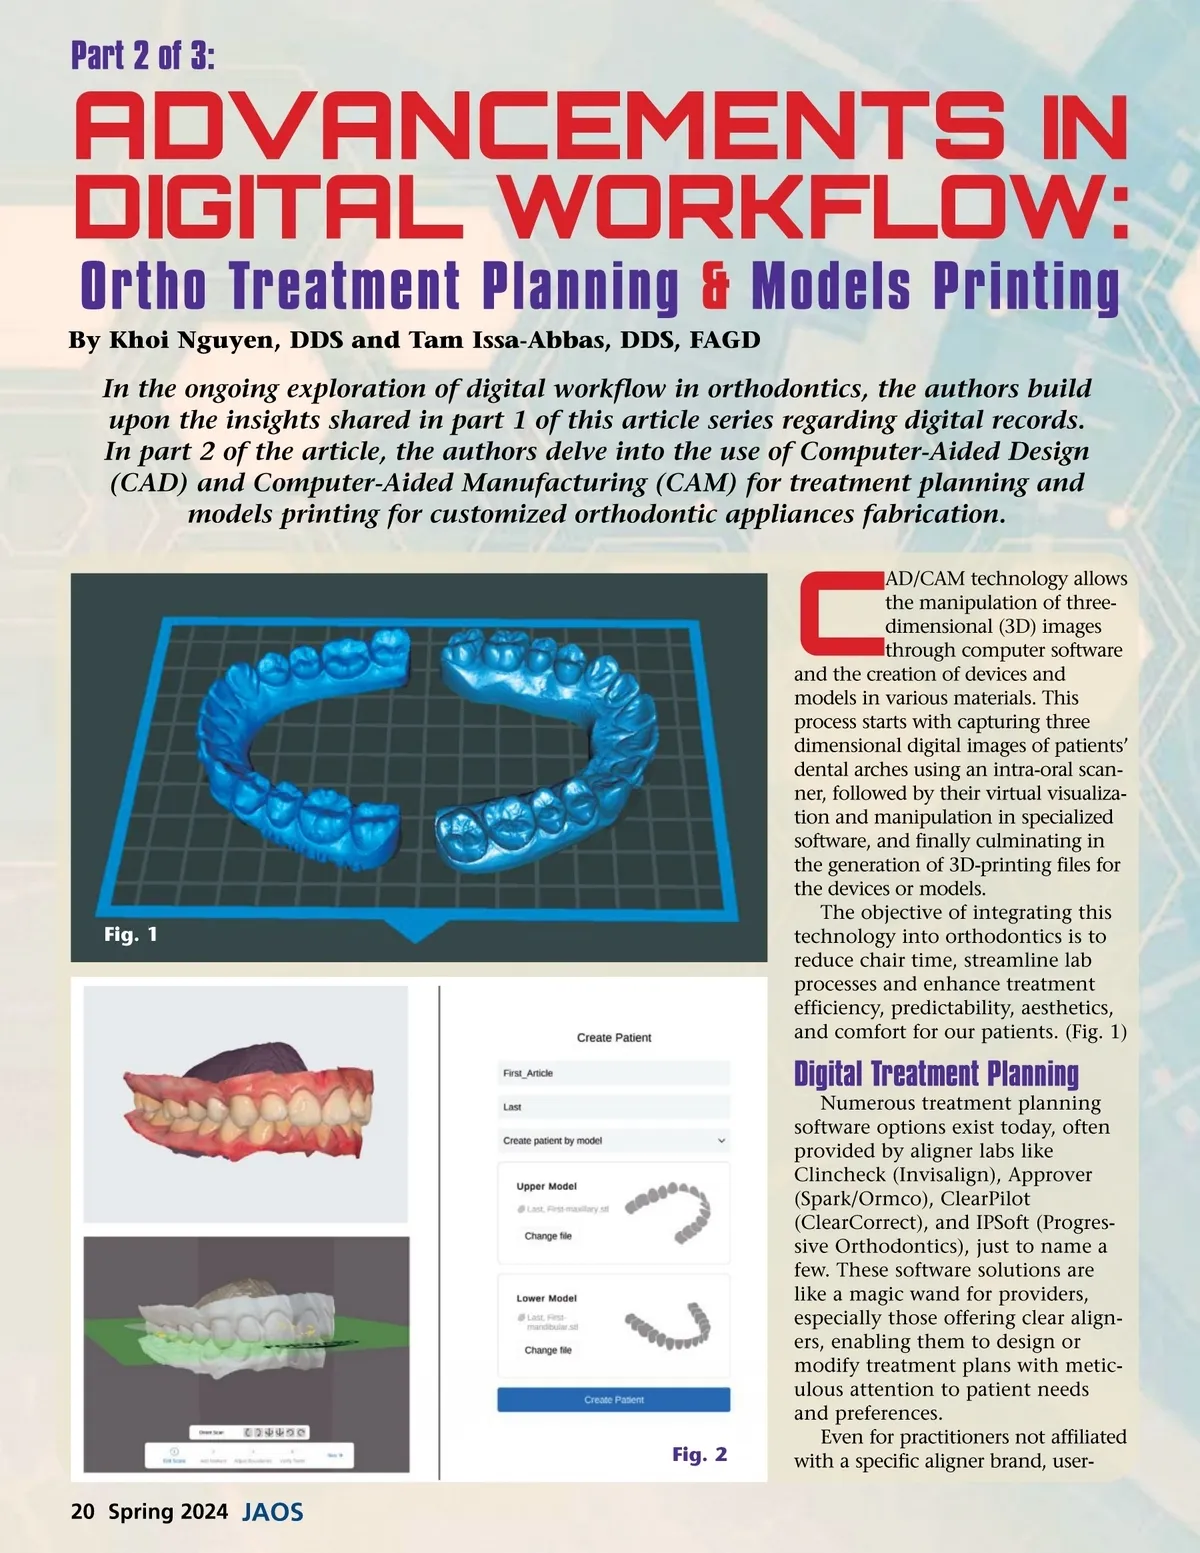
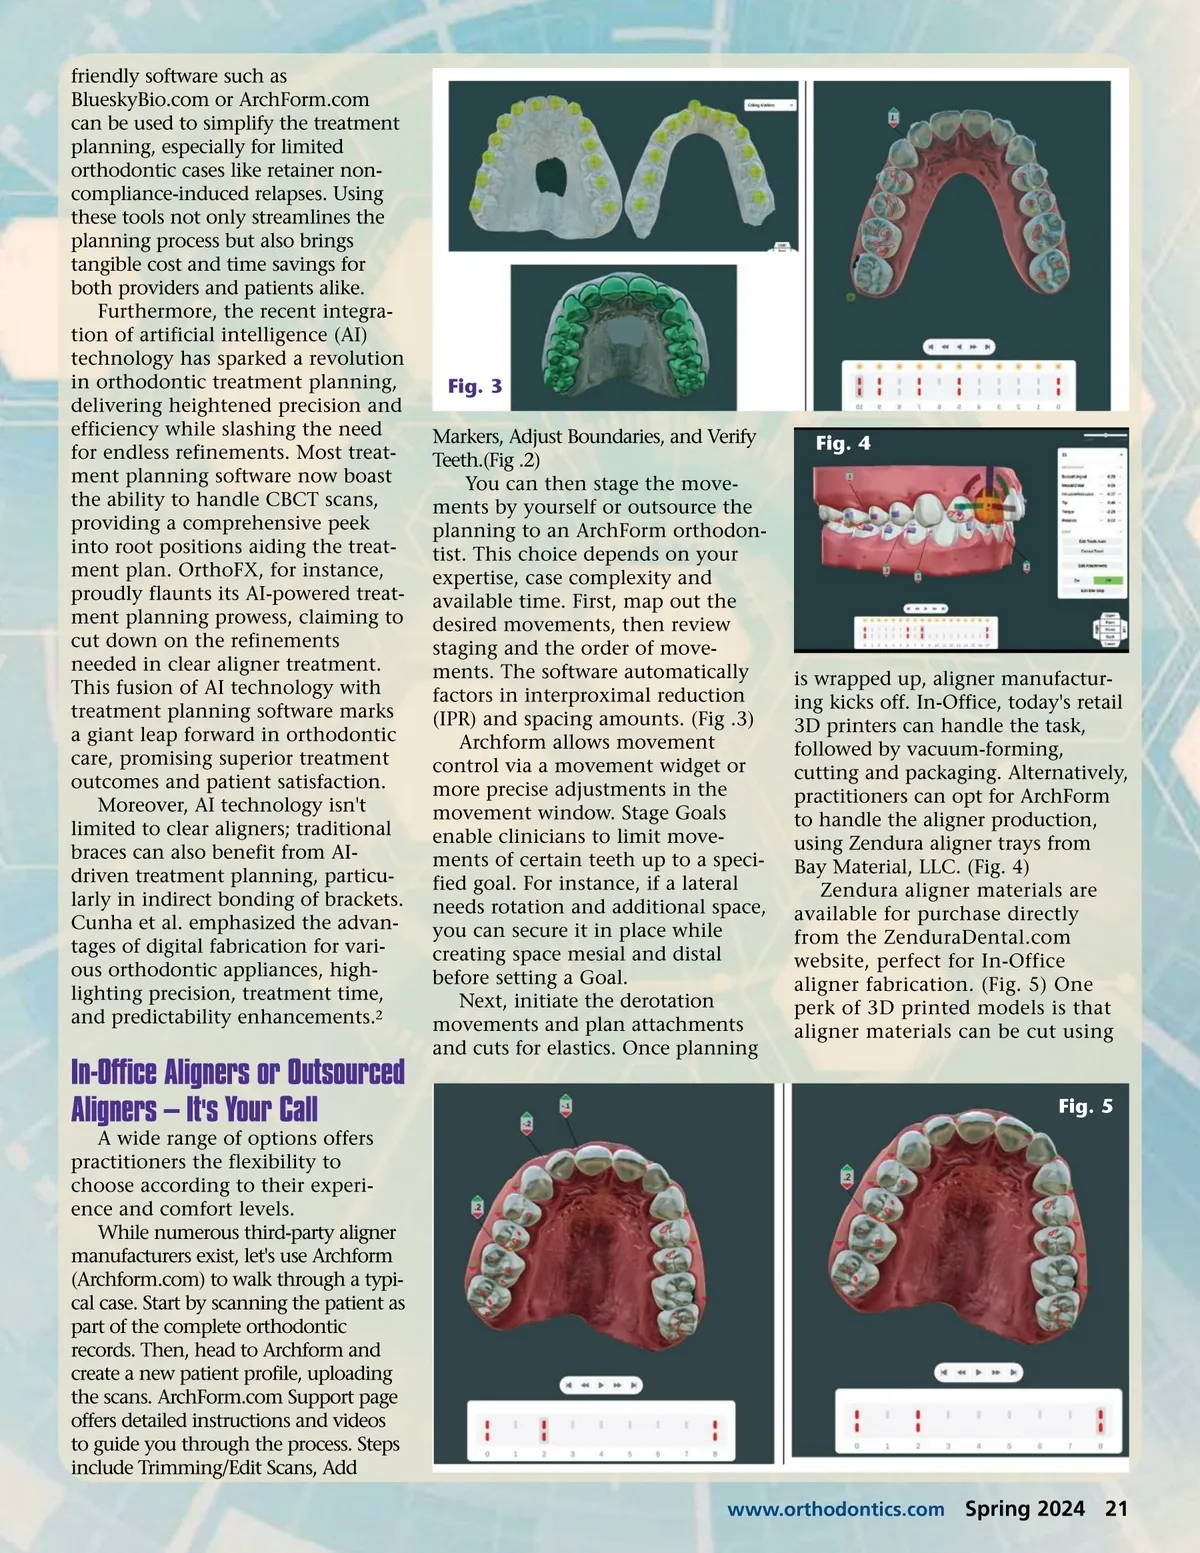
friendly software such as BlueskyBio.com or ArchForm.com can be used to simplify the treatment planning, especially for limited orthodontic cases like retainer non-compliance-induced relapses. Using these tools not only streamlines the planning process but also brings tangible cost and time savings for both providers and patients alike. Furthermore, the recent integra-tion of artificial intelligence (AI) technology has sparked a revolution in orthodontic treatment planning, delivering heightened precision and efficiency while slashing the need for endless refinements. Most treat-ment planning software now boast the ability to handle CBCT scans, providing a comprehensive peek into root positions aiding the treat-ment plan. OrthoFX, for instance, proudly flaunts its AI-powered treat-ment planning prowess, claiming to cut down on the refinements needed in clear aligner treatment. This fusion of AI technology with treatment planning software marks a giant leap forward in orthodontic care, promising superior treatment outcomes and patient satisfaction. Moreover, AI technology isn't limited to clear aligners; traditional braces can also benefit from AI-driven treatment planning, particu-larly in indirect bonding of brackets. Cunha et al. emphasized the advan-tages of digital fabrication for vari-ous orthodontic appliances, high-lighting precision, treatment time, and predictability enhancements. 2 Fig. 3 Markers, Adjust Boundaries, and Verify Teeth.(Fig .2) You can then stage the move-ments by yourself or outsource the planning to an ArchForm orthodon-tist. This choice depends on your expertise, case complexity and available time. First, map out the desired movements, then review staging and the order of move-ments. The software automatically factors in interproximal reduction (IPR) and spacing amounts. (Fig .3) Archform allows movement control via a movement widget or more precise adjustments in the movement window. Stage Goals enable clinicians to limit move-ments of certain teeth up to a speci-fied goal. For instance, if a lateral needs rotation and additional space, you can secure it in place while creating space mesial and distal before setting a Goal. Next, initiate the derotation movements and plan attachments and cuts for elastics. Once planning Fig. 4 is wrapped up, aligner manufactur-ing kicks off. In-Office, today's retail 3D printers can handle the task, followed by vacuum-forming, cutting and packaging. Alternatively, practitioners can opt for ArchForm to handle the aligner production, using Zendura aligner trays from Bay Material, LLC. (Fig. 4) Zendura aligner materials are available for purchase directly from the ZenduraDental.com website, perfect for In-Office aligner fabrication. (Fig. 5) One perk of 3D printed models is that aligner materials can be cut using In-Office Aligners or Outsourced Aligners – It's Your Call A wide range of options offers practitioners the flexibility to choose according to their experi-ence and comfort levels. While numerous third-party aligner manufacturers exist, let's use Archform (Archform.com) to walk through a typi-cal case. Start by scanning the patient as part of the complete orthodontic records. Then, head to Archform and create a new patient profile, uploading the scans. ArchForm.com Support page offers detailed instructions and videos to guide you through the process. Steps include Trimming/Edit Scans, Add Fig. 5 www.orthodontics.com Spring 2024 21
Journal of the American Orthodontic Society Spring 2024: Page 21