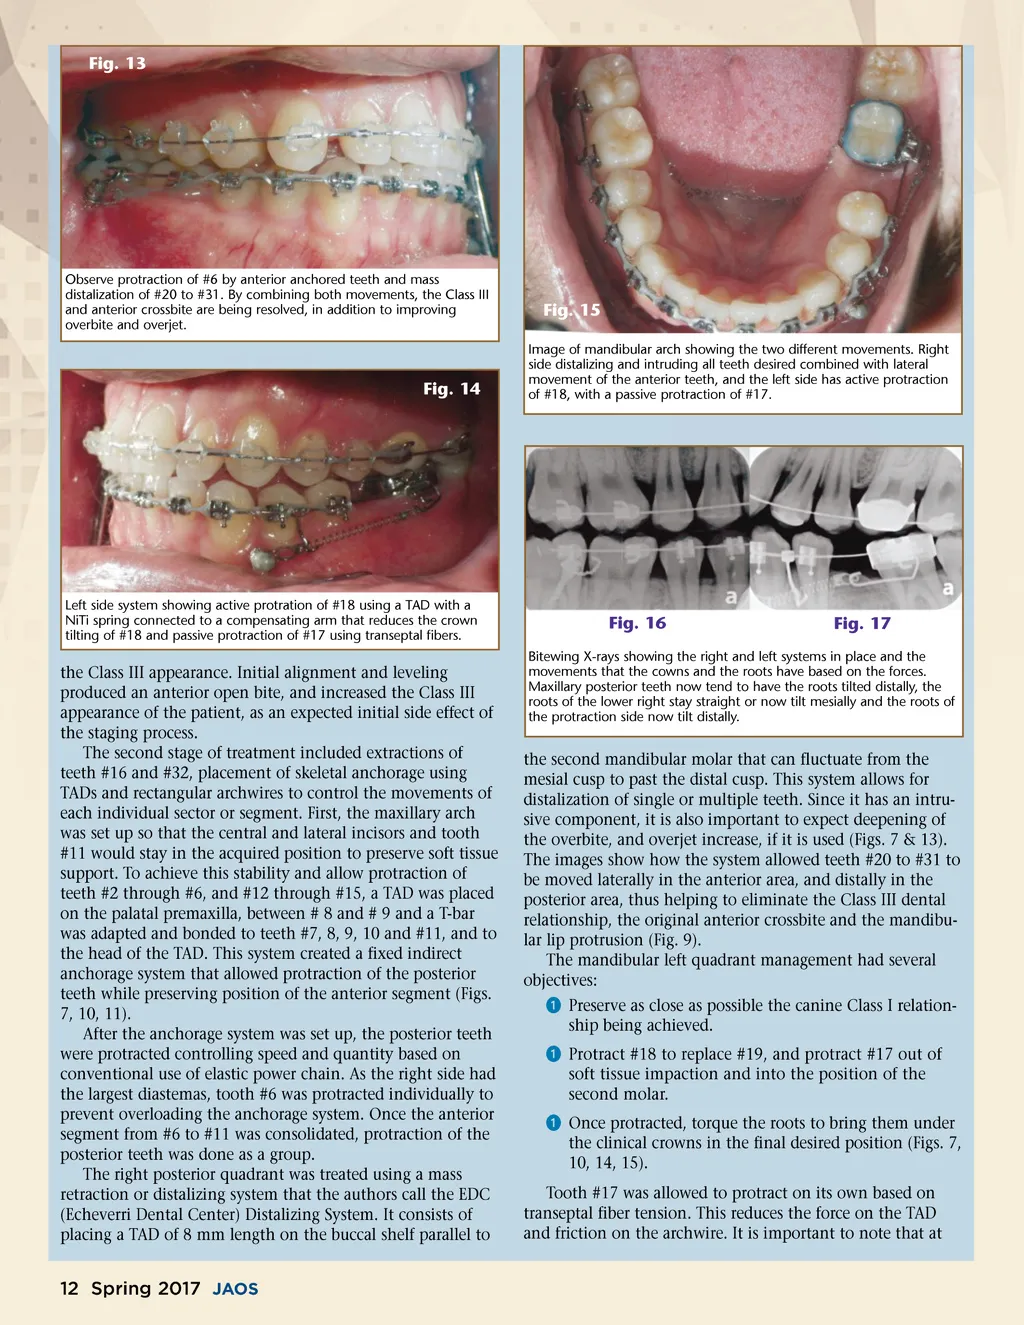
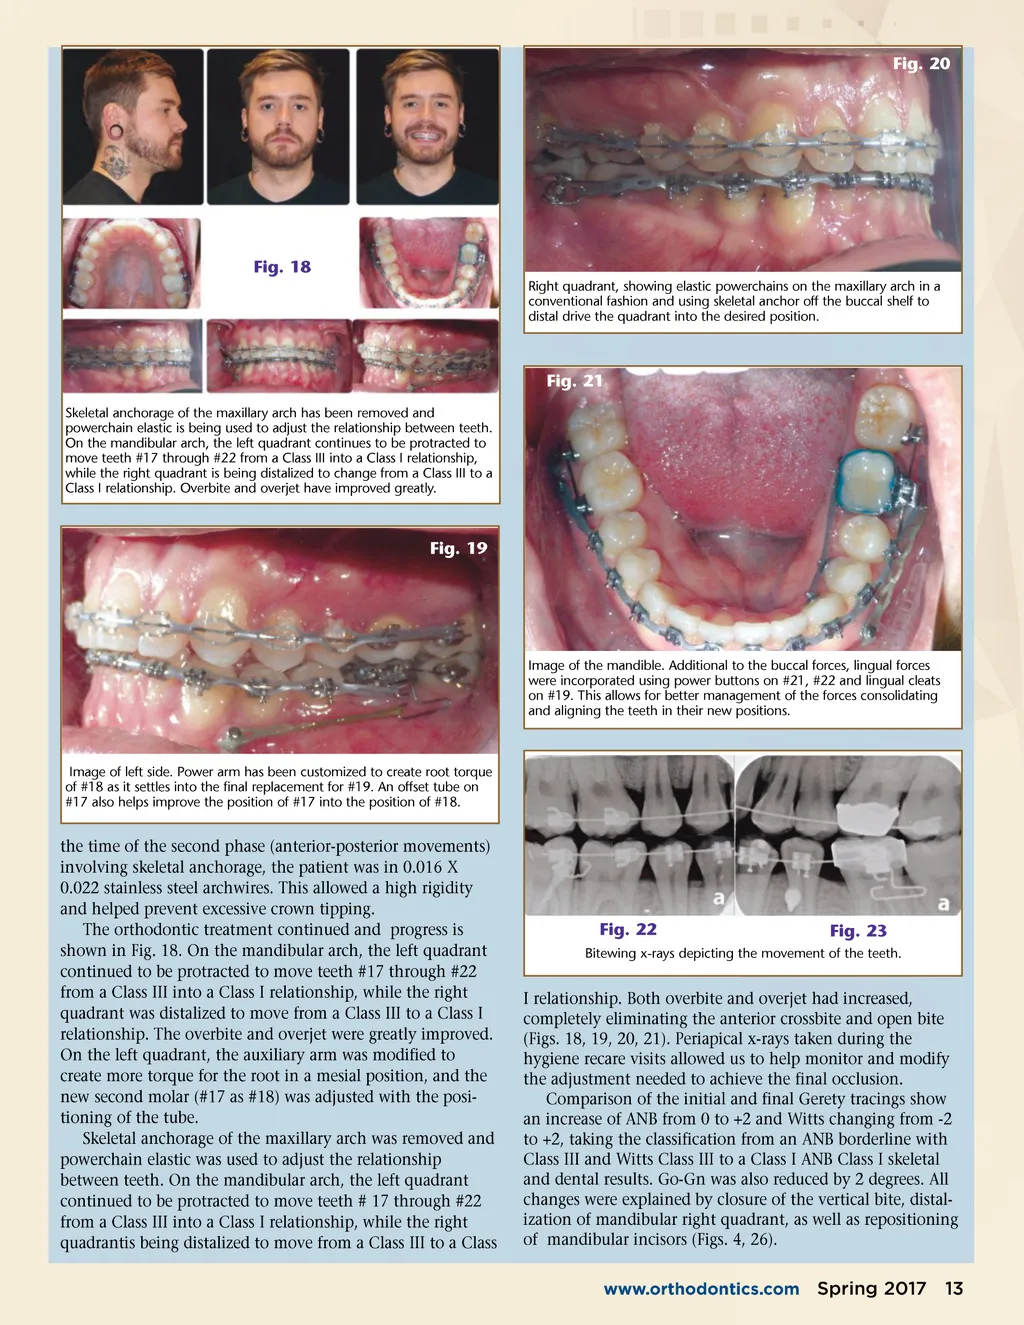
Fig. 13 Observe protraction of #6 by anterior anchored teeth and mass distalization of #20 to #31. By combining both movements, the Class III and anterior crossbite are being resolved, in addition to improving overbite and overjet. Fig. 15 Image of mandibular arch showing the two different movements. Right side distalizing and intruding all teeth desired combined with lateral movement of the anterior teeth, and the left side has active protraction of #18, with a passive protraction of #17. Fig. 14 Left side system showing active protration of #18 using a TAD with a NiTi spring connected to a compensating arm that reduces the crown tilting of #18 and passive protraction of #17 using transeptal fibers. Fig. 16 Fig. 17 the Class III appearance. Initial alignment and leveling produced an anterior open bite, and increased the Class III appearance of the patient, as an expected initial side effect of the staging process. The second stage of treatment included extractions of teeth #16 and #32, placement of skeletal anchorage using TADs and rectangular archwires to control the movements of each individual sector or segment. First, the maxillary arch was set up so that the central and lateral incisors and tooth #11 would stay in the acquired position to preserve soft tissue support. To achieve this stability and allow protraction of teeth #2 through #6, and #12 through #15, a TAD was placed on the palatal premaxilla, between # 8 and # 9 and a T-bar was adapted and bonded to teeth #7, 8, 9, 10 and #11, and to the head of the TAD. This system created a fixed indirect anchorage system that allowed protraction of the posterior teeth while preserving position of the anterior segment (Figs. 7, 10, 11). After the anchorage system was set up, the posterior teeth were protracted controlling speed and quantity based on conventional use of elastic power chain. As the right side had the largest diastemas, tooth #6 was protracted individually to prevent overloading the anchorage system. Once the anterior segment from #6 to #11 was consolidated, protraction of the posterior teeth was done as a group. The right posterior quadrant was treated using a mass retraction or distalizing system that the authors call the EDC (Echeverri Dental Center) Distalizing System. It consists of placing a TAD of 8 mm length on the buccal shelf parallel to Bitewing X-rays showing the right and left systems in place and the movements that the cowns and the roots have based on the forces. Maxillary posterior teeth now tend to have the roots tilted distally, the roots of the lower right stay straight or now tilt mesially and the roots of the protraction side now tilt distally. the second mandibular molar that can fluctuate from the mesial cusp to past the distal cusp. This system allows for distalization of single or multiple teeth. Since it has an intru-sive component, it is also important to expect deepening of the overbite, and overjet increase, if it is used (Figs. 7 & 13). The images show how the system allowed teeth #20 to #31 to be moved laterally in the anterior area, and distally in the posterior area, thus helping to eliminate the Class III dental relationship, the original anterior crossbite and the mandibu-lar lip protrusion (Fig. 9). The mandibular left quadrant management had several objectives: ᕡ Preserve as close as possible the canine Class I relation-ship being achieved. ᕡ Protract #18 to replace #19, and protract #17 out of soft tissue impaction and into the position of the second molar. ᕡ Once protracted, torque the roots to bring them under the clinical crowns in the final desired position (Figs. 7, 10, 14, 15). Tooth #17 was allowed to protract on its own based on transeptal fiber tension. This reduces the force on the TAD and friction on the archwire. It is important to note that at 12 Spring 2017 JAOS
Journal of the American Orthodontic Society Spring 2017: Page 12