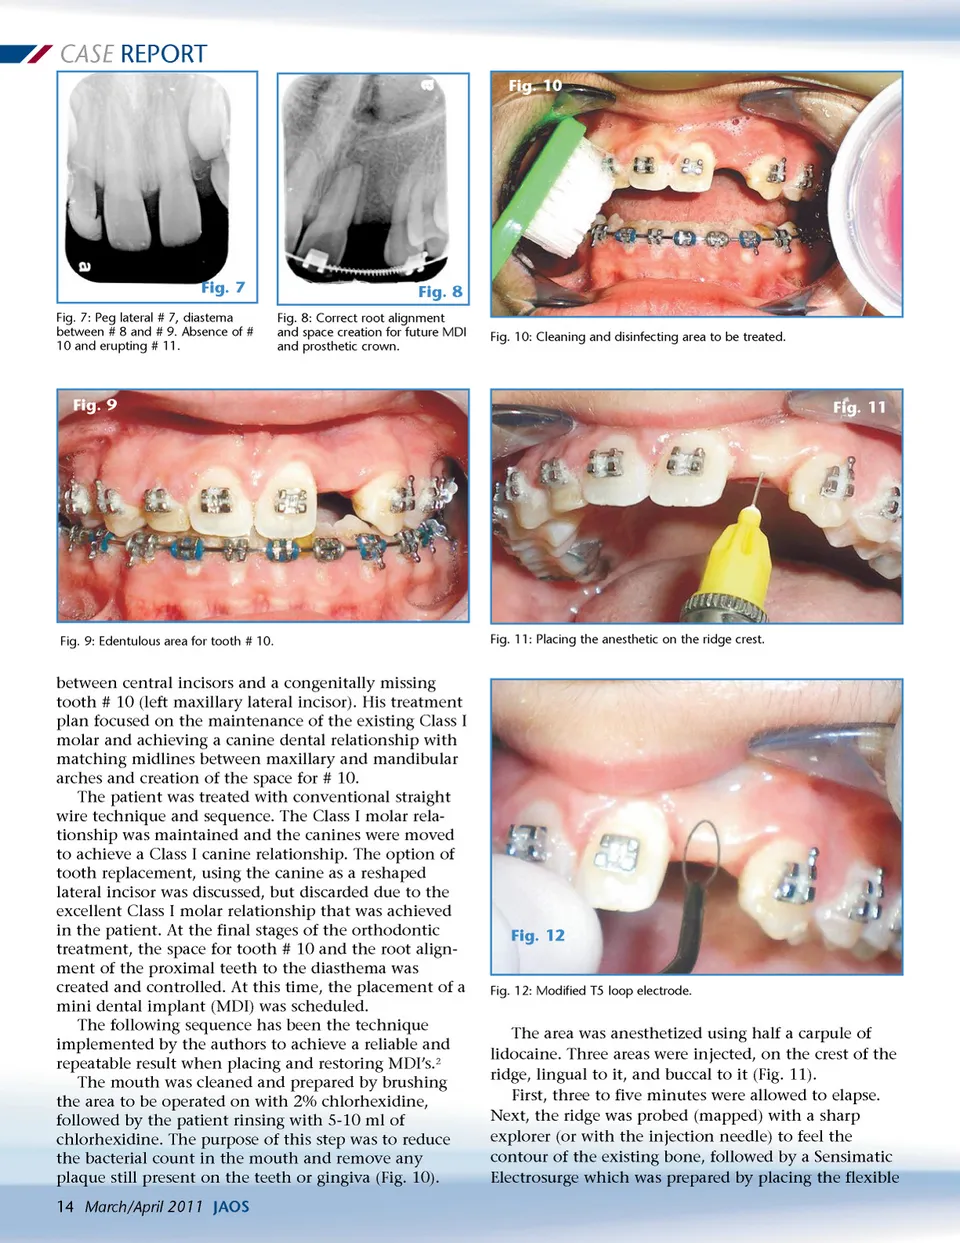
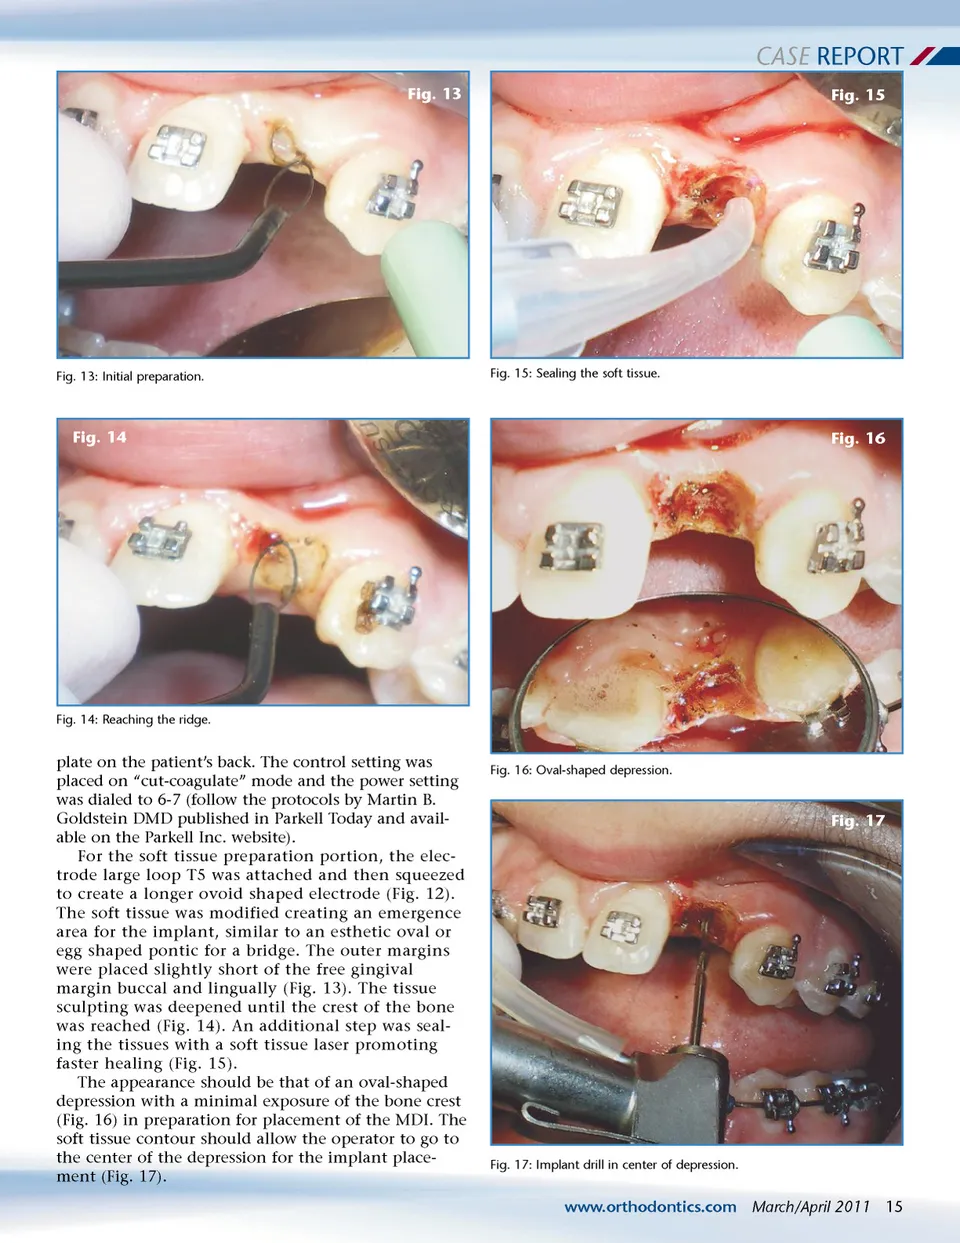
CASE REPORT Fig. 10 Fig. 7 Fig. 7: Peg lateral # 7, diastema between # 8 and # 9. Absence of # 10 and erupting # 11. Fig. 8 Fig. 8: Correct root alignment and space creation for future MDI and prosthetic crown. Fig. 10: Cleaning and disinfecting area to be treated. Fig. 9 Fig. 11 Fig. 9: Edentulous area for tooth # 10. Fig. 11: Placing the anesthetic on the ridge crest. between central incisors and a congenitally missing tooth # 10 (left maxillary lateral incisor). His treatment plan focused on the maintenance of the existing Class I molar and achieving a canine dental relationship with matching midlines between maxillary and mandibular arches and creation of the space for # 10. The patient was treated with conventional straight wire technique and sequence. The Class I molar rela-tionship was maintained and the canines were moved to achieve a Class I canine relationship. The option of tooth replacement, using the canine as a reshaped lateral incisor was discussed, but discarded due to the excellent Class I molar relationship that was achieved in the patient. At the final stages of the orthodontic treatment, the space for tooth # 10 and the root align-ment of the proximal teeth to the diasthema was created and controlled. At this time, the placement of a mini dental implant (MDI) was scheduled. The following sequence has been the technique implemented by the authors to achieve a reliable and repeatable result when placing and restoring MDI’s. 2 The mouth was cleaned and prepared by brushing the area to be operated on with 2% chlorhexidine, followed by the patient rinsing with 5-10 ml of chlorhexidine. The purpose of this step was to reduce the bacterial count in the mouth and remove any plaque still present on the teeth or gingiva (Fig. 10). 14 March/April 2011 JAOS Fig. 12 Fig. 12: Modified T5 loop electrode. The area was anesthetized using half a carpule of lidocaine. Three areas were injected, on the crest of the ridge, lingual to it, and buccal to it (Fig. 11). First, three to five minutes were allowed to elapse. Next, the ridge was probed (mapped) with a sharp explorer (or with the injection needle) to feel the contour of the existing bone, followed by a Sensimatic Electrosurge which was prepared by placing the flexible
Journal of the American Orthodontic Society March-April 2011: Page 14