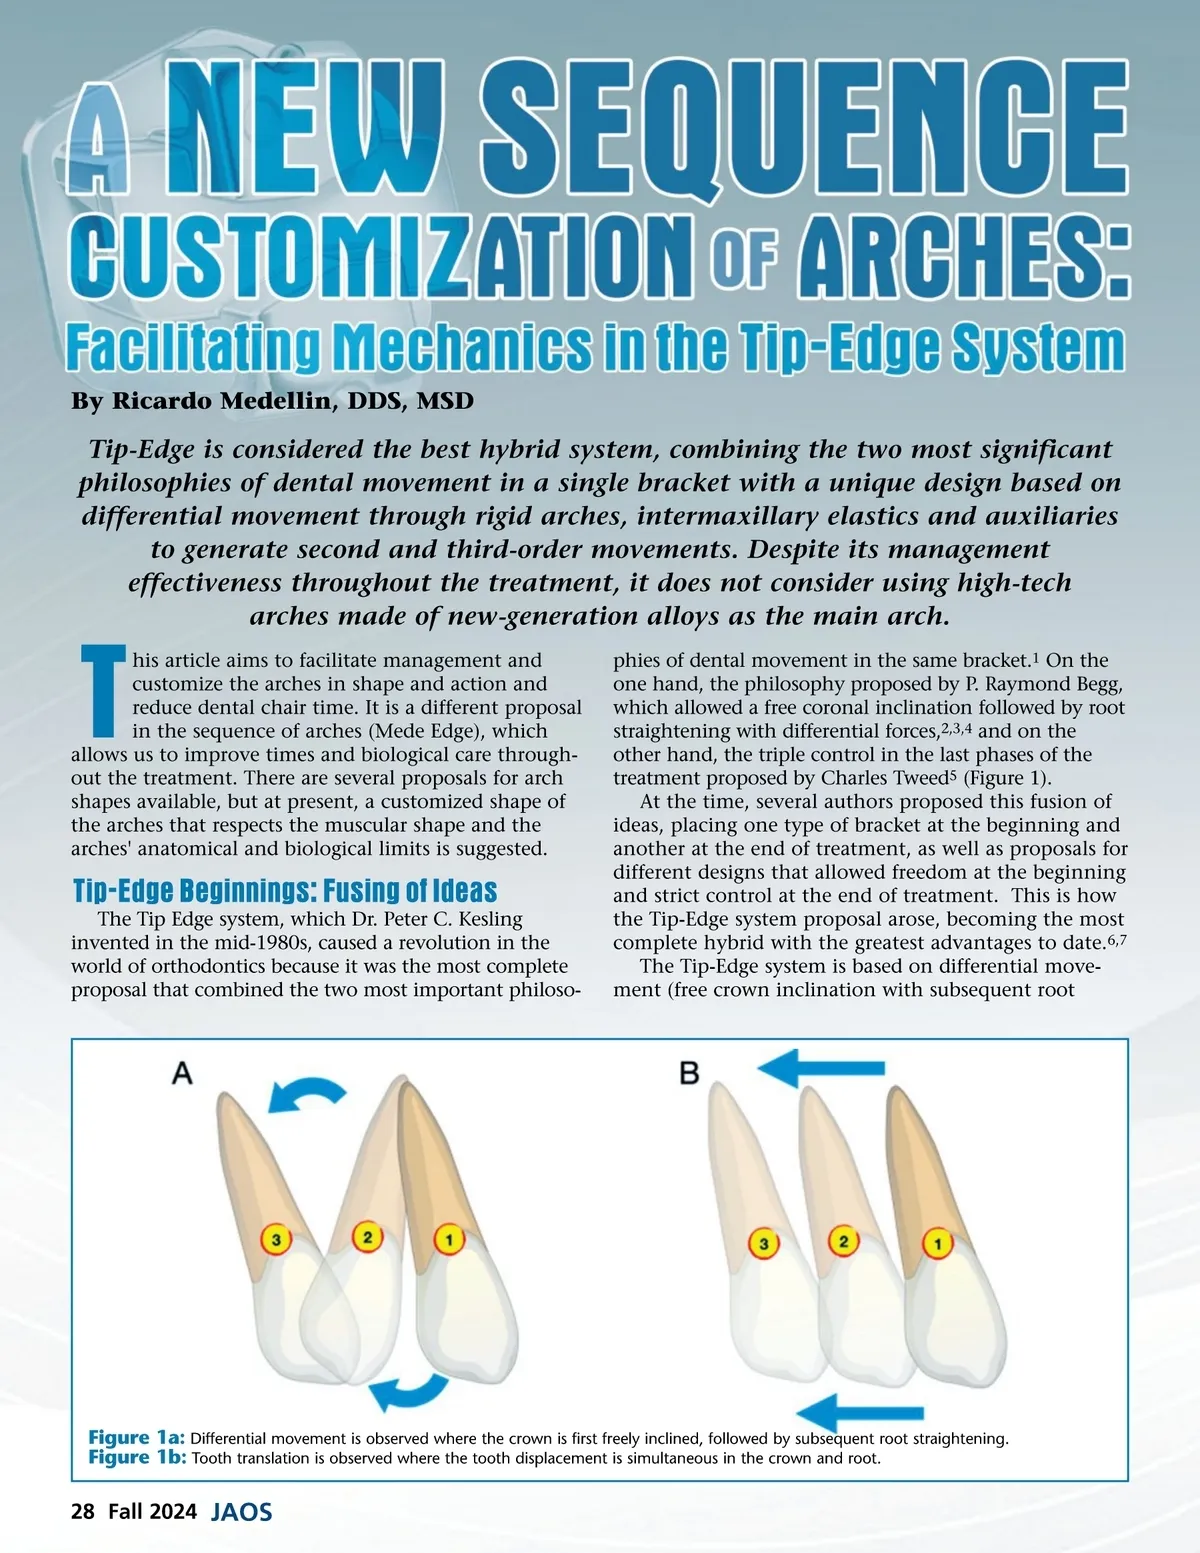
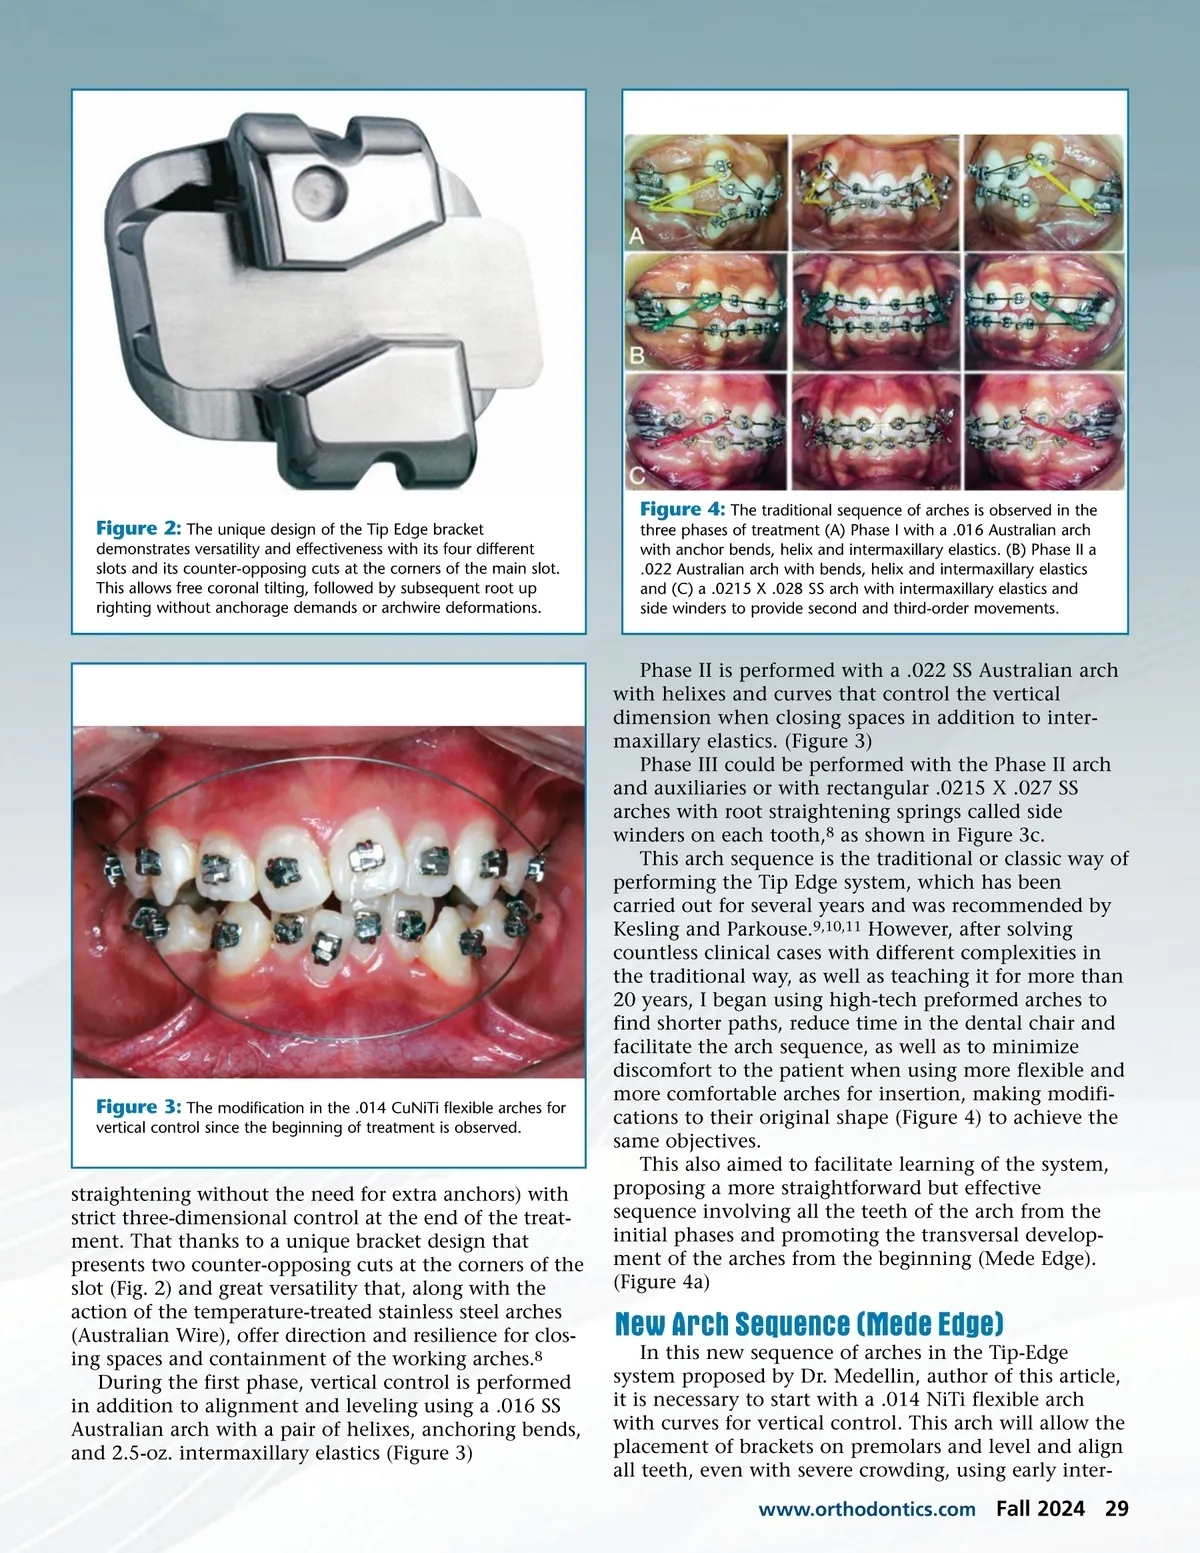
Figure 2: The unique design of the Tip Edge bracket demonstrates versatility and effectiveness with its four different slots and its counter-opposing cuts at the corners of the main slot. This allows free coronal tilting, followed by subsequent root up righting without anchorage demands or archwire deformations. Figure 4: The traditional sequence of arches is observed in the three phases of treatment (A) Phase I with a .016 Australian arch with anchor bends, helix and intermaxillary elastics. (B) Phase II a .022 Australian arch with bends, helix and intermaxillary elastics and (C) a .0215 X .028 SS arch with intermaxillary elastics and side winders to provide second and third-order movements. Figure 3: The modification in the .014 CuNiTi flexible arches for vertical control since the beginning of treatment is observed. straightening without the need for extra anchors) with strict three-dimensional control at the end of the treat-ment. That thanks to a unique bracket design that presents two counter-opposing cuts at the corners of the slot (Fig. 2) and great versatility that, along with the action of the temperature-treated stainless steel arches (Australian Wire), offer direction and resilience for clos-ing spaces and containment of the working arches. 8 During the first phase, vertical control is performed in addition to alignment and leveling using a .016 SS Australian arch with a pair of helixes, anchoring bends, and 2.5-oz. intermaxillary elastics (Figure 3) Phase II is performed with a .022 SS Australian arch with helixes and curves that control the vertical dimension when closing spaces in addition to inter-maxillary elastics. (Figure 3) Phase III could be performed with the Phase II arch and auxiliaries or with rectangular .0215 X .027 SS arches with root straightening springs called side winders on each tooth, 8 as shown in Figure 3c. This arch sequence is the traditional or classic way of performing the Tip Edge system, which has been carried out for several years and was recommended by Kesling and Parkouse. 9,10,11 However, after solving countless clinical cases with different complexities in the traditional way, as well as teaching it for more than 20 years, I began using high-tech preformed arches to find shorter paths, reduce time in the dental chair and facilitate the arch sequence, as well as to minimize discomfort to the patient when using more flexible and more comfortable arches for insertion, making modifi-cations to their original shape (Figure 4) to achieve the same objectives. This also aimed to facilitate learning of the system, proposing a more straightforward but effective sequence involving all the teeth of the arch from the initial phases and promoting the transversal develop-ment of the arches from the beginning (Mede Edge). (Figure 4a) New Arch Sequence (Mede Edge) In this new sequence of arches in the Tip-Edge system proposed by Dr. Medellin, author of this article, it is necessary to start with a .014 NiTi flexible arch with curves for vertical control. This arch will allow the placement of brackets on premolars and level and align all teeth, even with severe crowding, using early inter-www.orthodontics.com Fall 2024 29
Journal of the American Orthodontic Society Fall 2024: Page 29