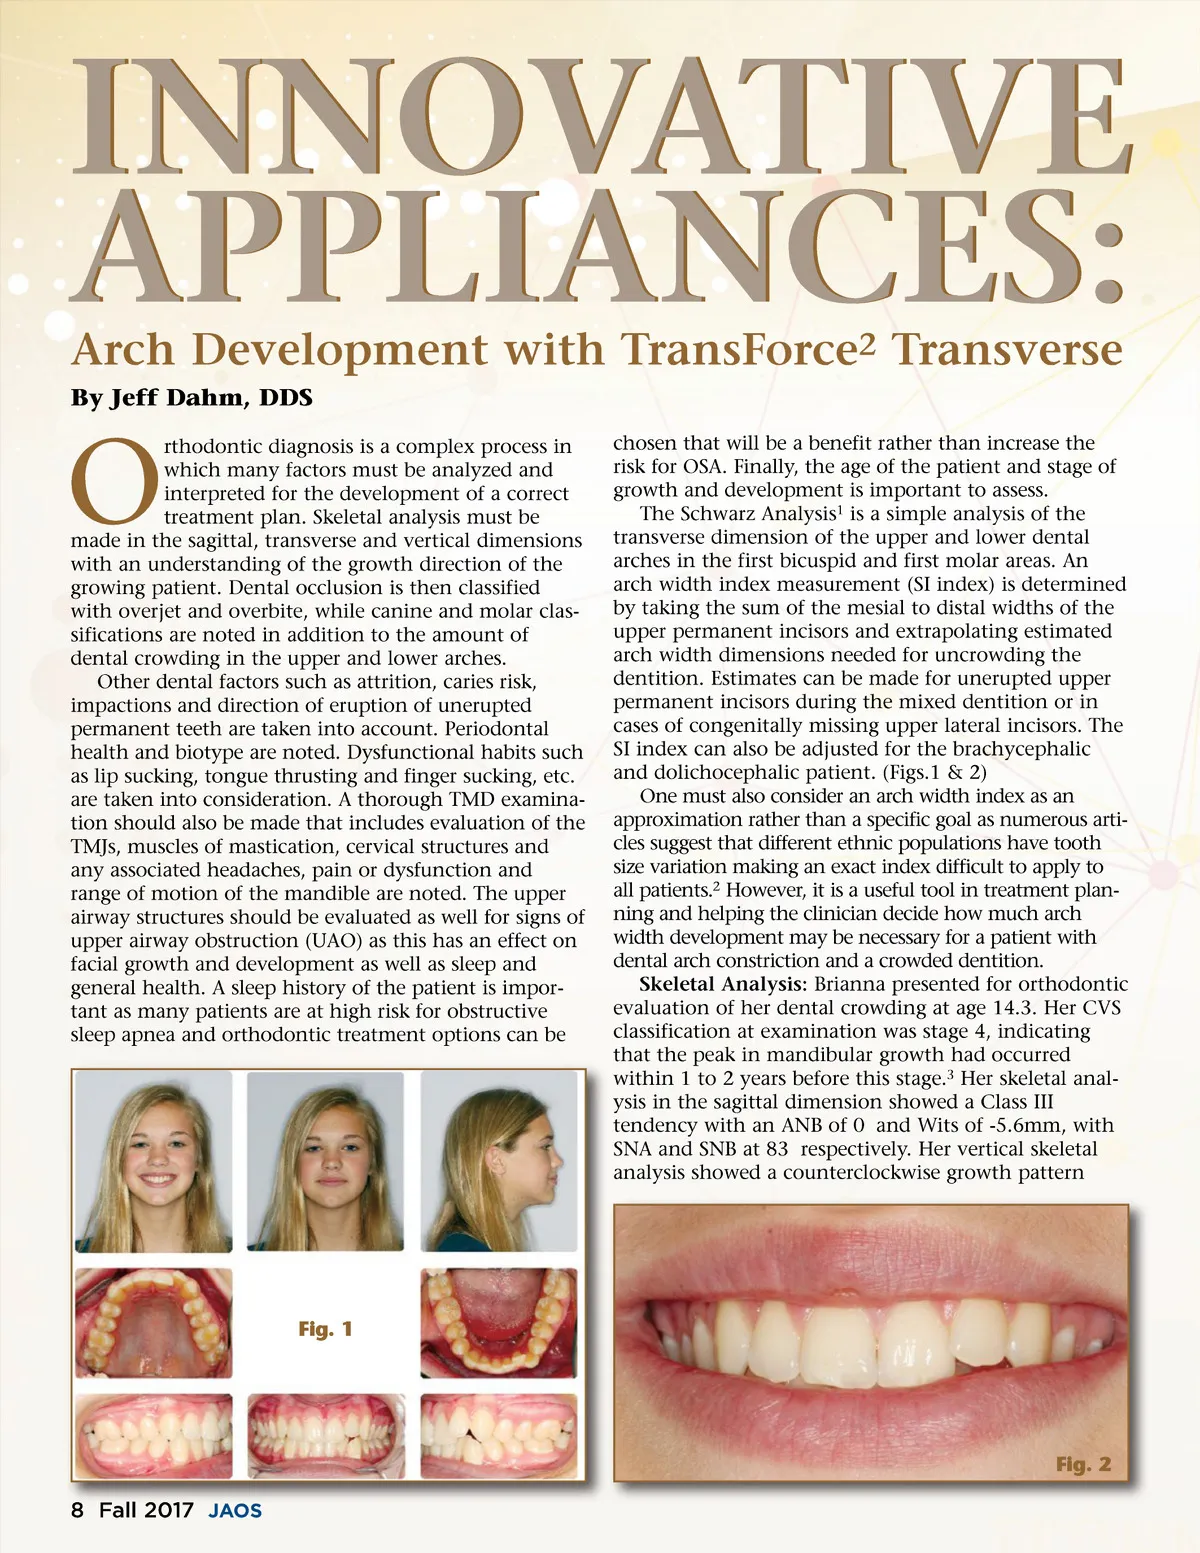
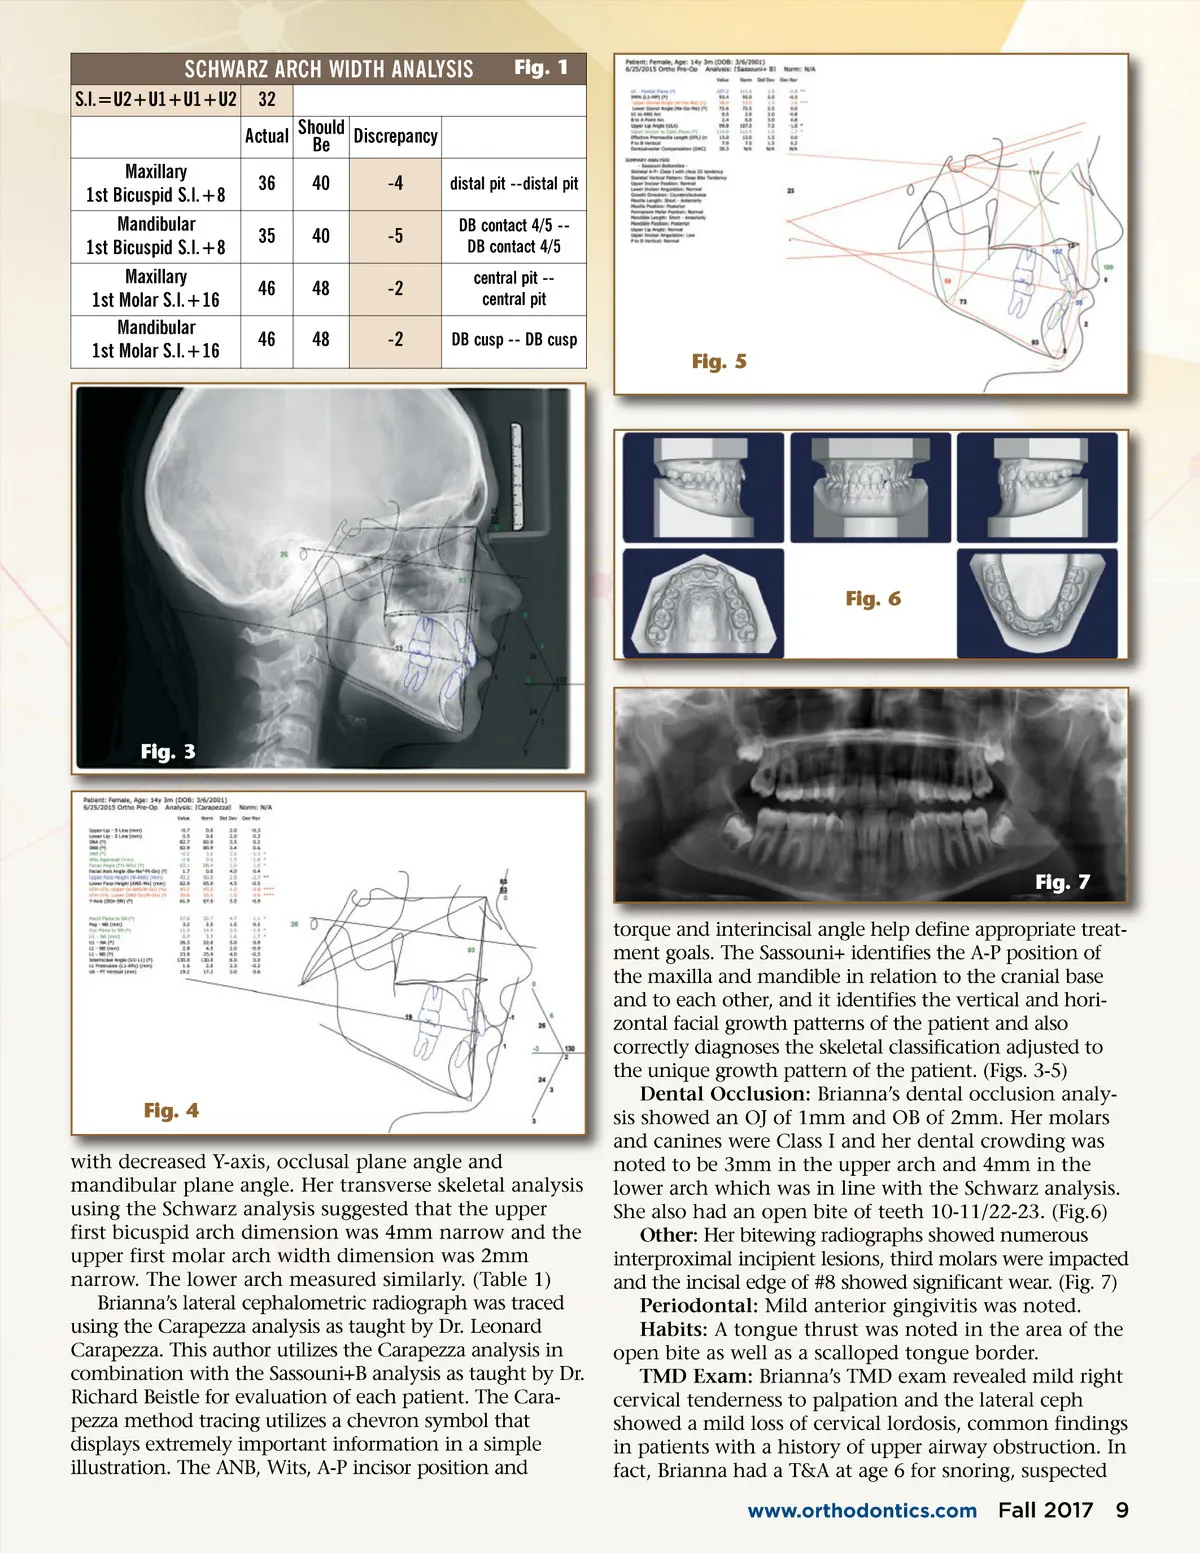
SCHWARZ ARCH WIDTH ANALYSIS S.I.=U2+U1+U1+U2 32 Actual Should Be Discrepancy Maxillary 1st Bicuspid S.I.+8 Mandibular 1st Bicuspid S.I.+8 Maxillary 1st Molar S.I.+16 Mandibular 1st Molar S.I.+16 36 35 46 46 40 40 48 48 -4 -5 -2 -2 Fig. 1 distal pit --distal pit DB contact 4/5 --DB contact 4/5 central pit --central pit DB cusp --DB cusp Fig. 5 Fig. 6 Fig. 3 Fig. 7 torque and interincisal angle help define appropriate treat-ment goals. The Sassouni+ identifies the A-P position of the maxilla and mandible in relation to the cranial base and to each other, and it identifies the vertical and hori-zontal facial growth patterns of the patient and also correctly diagnoses the skeletal classification adjusted to the unique growth pattern of the patient. (Figs. 3-5) Dental Occlusion: Brianna’s dental occlusion analy-sis showed an OJ of 1mm and OB of 2mm. Her molars and canines were Class I and her dental crowding was noted to be 3mm in the upper arch and 4mm in the lower arch which was in line with the Schwarz analysis. She also had an open bite of teeth 10-11/22-23. (Fig.6) Other: Her bitewing radiographs showed numerous interproximal incipient lesions, third molars were impacted and the incisal edge of #8 showed significant wear. (Fig. 7) Periodontal: Mild anterior gingivitis was noted. Habits: A tongue thrust was noted in the area of the open bite as well as a scalloped tongue border. TMD Exam: Brianna’s TMD exam revealed mild right cervical tenderness to palpation and the lateral ceph showed a mild loss of cervical lordosis, common findings in patients with a history of upper airway obstruction. In fact, Brianna had a T&A at age 6 for snoring, suspected www.orthodontics.com Fig. 4 with decreased Y-axis, occlusal plane angle and mandibular plane angle. Her transverse skeletal analysis using the Schwarz analysis suggested that the upper first bicuspid arch dimension was 4mm narrow and the upper first molar arch width dimension was 2mm narrow. The lower arch measured similarly. (Table 1) Brianna’s lateral cephalometric radiograph was traced using the Carapezza analysis as taught by Dr. Leonard Carapezza. This author utilizes the Carapezza analysis in combination with the Sassouni+B analysis as taught by Dr. Richard Beistle for evaluation of each patient. The Cara-pezza method tracing utilizes a chevron symbol that displays extremely important information in a simple illustration. The ANB, Wits, A-P incisor position and Fall 2017 9
Journal of the American Orthodontic Society Fall 2017: Page 9