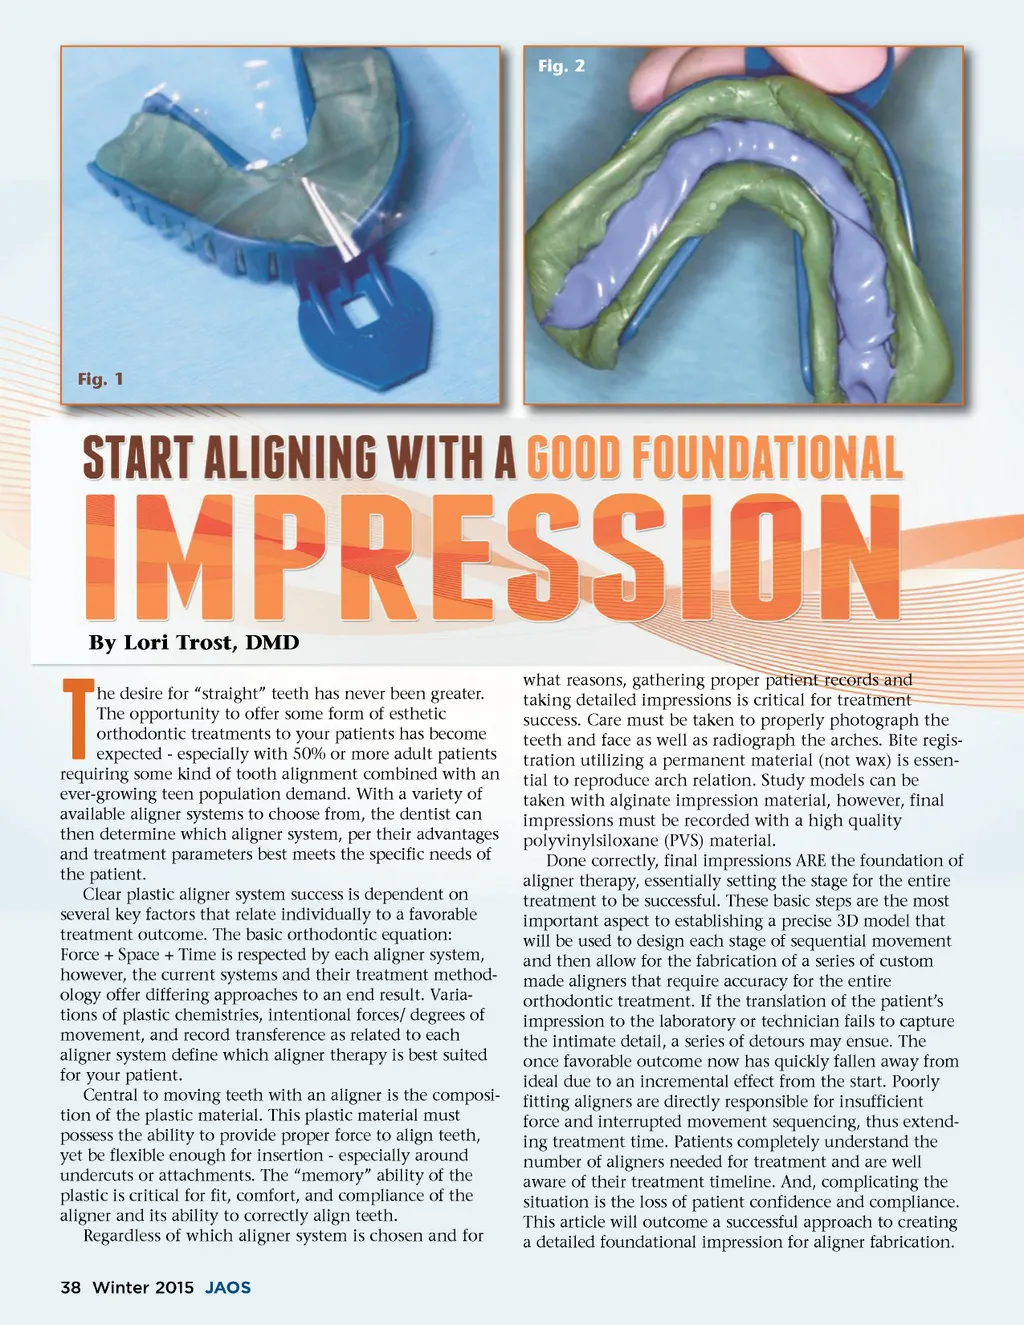
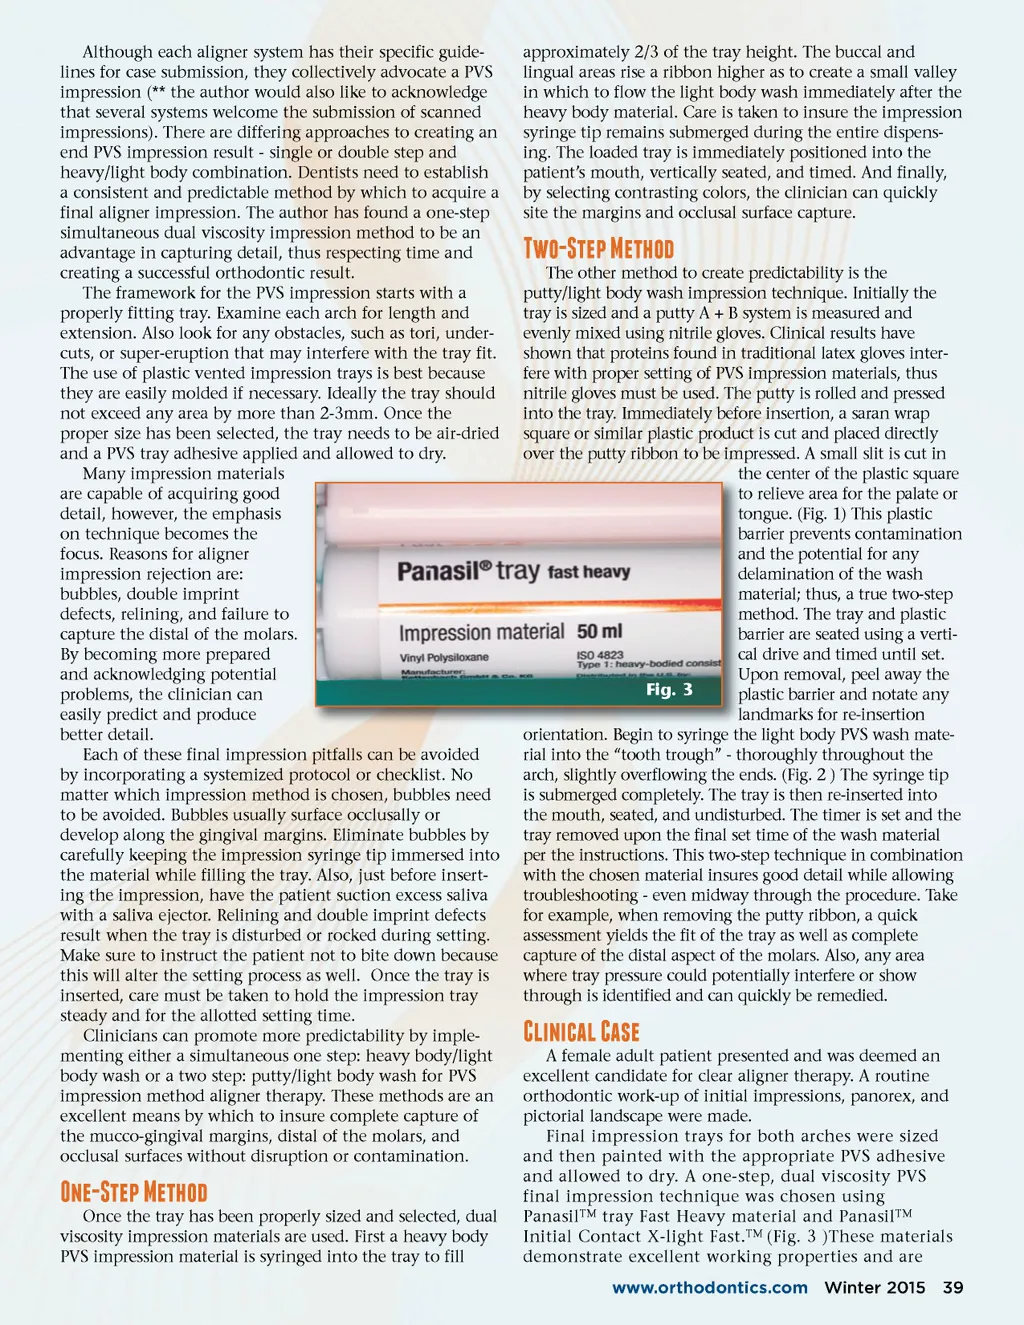
Although each aligner system has their specific guide-lines for case submission, they collectively advocate a PVS impression (** the author would also like to acknowledge that several systems welcome the submission of scanned impressions). There are differing approaches to creating an end PVS impression result -single or double step and heavy/light body combination. Dentists need to establish a consistent and predictable method by which to acquire a final aligner impression. The author has found a one-step simultaneous dual viscosity impression method to be an advantage in capturing detail, thus respecting time and creating a successful orthodontic result. The framework for the PVS impression starts with a properly fitting tray. Examine each arch for length and extension. Also look for any obstacles, such as tori, under-cuts, or super-eruption that may interfere with the tray fit. The use of plastic vented impression trays is best because they are easily molded if necessary. Ideally the tray should not exceed any area by more than 2-3mm. Once the proper size has been selected, the tray needs to be air-dried and a PVS tray adhesive applied and allowed to dry. Many impression materials are capable of acquiring good detail, however, the emphasis on technique becomes the focus. Reasons for aligner impression rejection are: bubbles, double imprint defects, relining, and failure to capture the distal of the molars. By becoming more prepared and acknowledging potential problems, the clinician can easily predict and produce better detail. Each of these final impression pitfalls can be avoided by incorporating a systemized protocol or checklist. No matter which impression method is chosen, bubbles need to be avoided. Bubbles usually surface occlusally or develop along the gingival margins. Eliminate bubbles by carefully keeping the impression syringe tip immersed into the material while filling the tray. Also, just before insert-ing the impression, have the patient suction excess saliva with a saliva ejector. Relining and double imprint defects result when the tray is disturbed or rocked during setting. Make sure to instruct the patient not to bite down because this will alter the setting process as well. Once the tray is inserted, care must be taken to hold the impression tray steady and for the allotted setting time. Clinicians can promote more predictability by imple-menting either a simultaneous one step: heavy body/light body wash or a two step: putty/light body wash for PVS impression method aligner therapy. These methods are an excellent means by which to insure complete capture of the mucco-gingival margins, distal of the molars, and occlusal surfaces without disruption or contamination. approximately 2/3 of the tray height. The buccal and lingual areas rise a ribbon higher as to create a small valley in which to flow the light body wash immediately after the heavy body material. Care is taken to insure the impression syringe tip remains submerged during the entire dispens-ing. The loaded tray is immediately positioned into the patient’s mouth, vertically seated, and timed. And finally, by selecting contrasting colors, the clinician can quickly site the margins and occlusal surface capture. �a;�b; �c; The other method to create predictability is the putty/light body wash impression technique. Initially the tray is sized and a putty A + B system is measured and evenly mixed using nitrile gloves. Clinical results have shown that proteins found in traditional latex gloves inter-fere with proper setting of PVS impression materials, thus nitrile gloves must be used. The putty is rolled and pressed into the tray. Immediately before insertion, a saran wrap square or similar plastic product is cut and placed directly over the putty ribbon to be impressed. A small slit is cut in th center of the plastic square the to relieve area for the palate or to tongue. (Fig. 1) This plastic barrier b prevents contamination and a the potential for any delamination d of the wash material; m thus, a true two-step method. m The tray and plastic barrier b are seated using a verti-cal c drive and timed until set. Upon U removal, peel away the Fig. 3 plastic p barrier and notate any landmarks la for re-insertion orientation. Begin to syringe the h light body PVS wash mate-rial into the “tooth trough” -thoroughly throughout the arch, slightly overflowing the ends. (Fig. 2 ) The syringe tip is submerged completely. The tray is then re-inserted into the mouth, seated, and undisturbed. The timer is set and the tray removed upon the final set time of the wash material per the instructions. This two-step technique in combination with the chosen material insures good detail while allowing troubleshooting -even midway through the procedure. Take for example, when removing the putty ribbon, a quick assessment yields the fit of the tray as well as complete capture of the distal aspect of the molars. Also, any area where tray pressure could potentially interfere or show through is identified and can quickly be remedied. �d; �f;�f;�e; �d;�e; A female adult patient presented and was deemed an excellent candidate for clear aligner therapy. A routine orthodontic work-up of initial impressions, panorex, and pictorial landscape were made. Final impression trays for both arches were sized and then painted with the appropriate PVS adhesive and allowed to dry. A one-step, dual viscosity PVS final impression technique was chosen using Panasil TM tray Fast Heavy material and Panasil TM Initial Contact X-light Fast. TM (Fig. 3 )These materials demonstrate excellent working properties and are www.orthodontics.com Winter 2015 39 �a;�b; �c; Once the tray has been properly sized and selected, dual viscosity impression materials are used. First a heavy body PVS impression material is syringed into the tray to fill
Journal of the American Orthodontic Society Winter 2015: Page 39