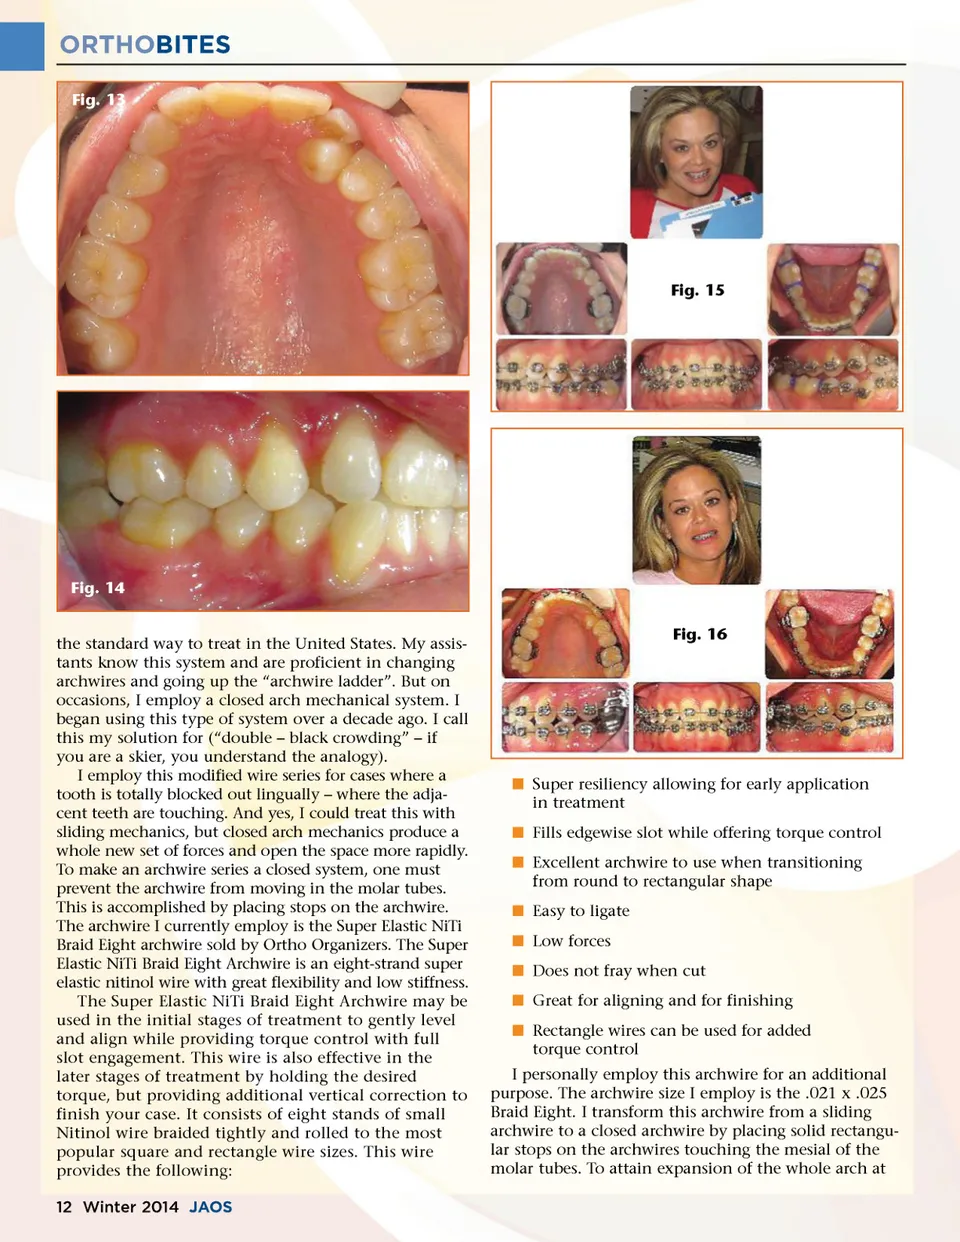
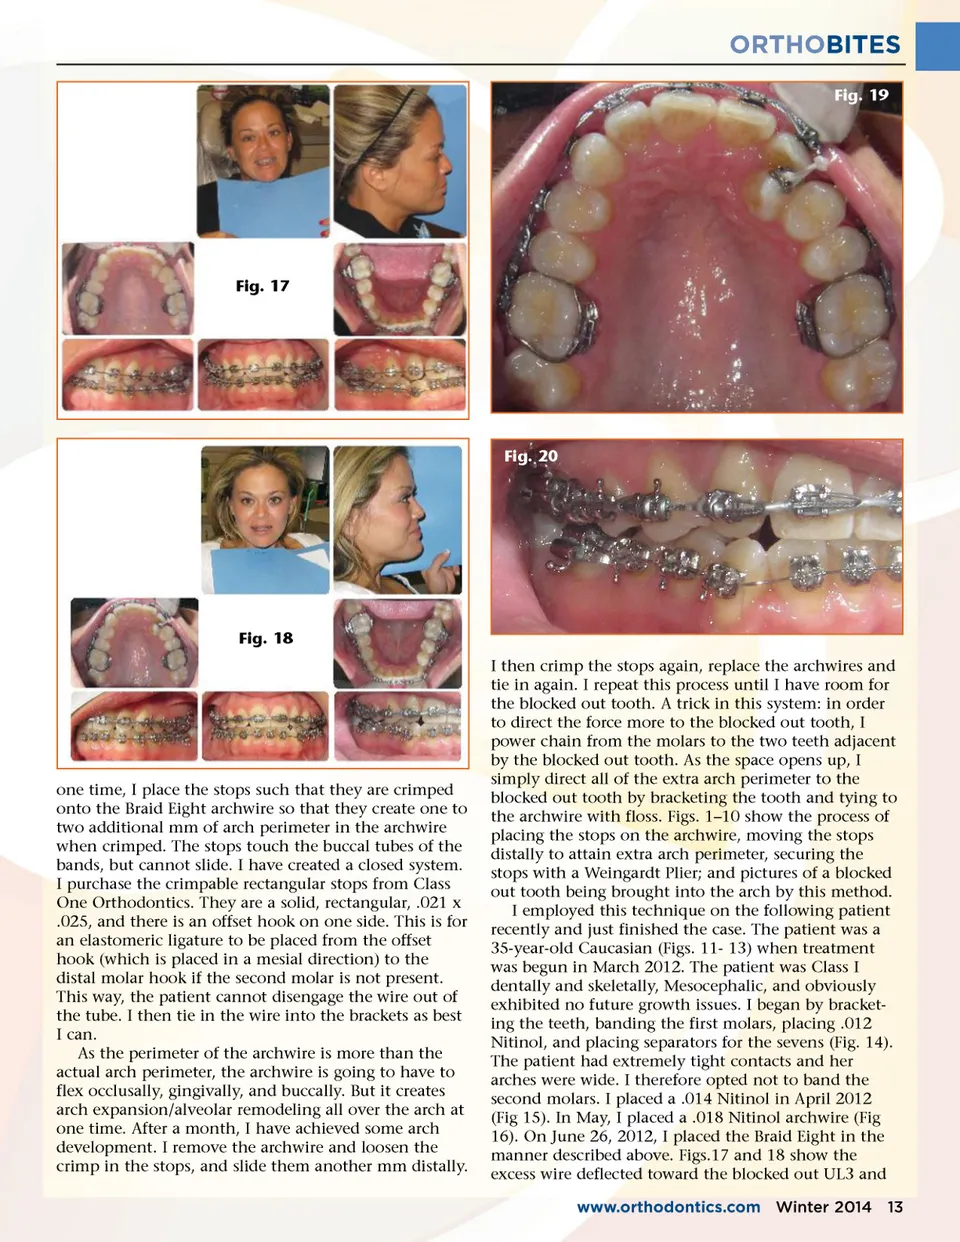
ORTHOBITES Fig. 19 Fig. 17 Fig. 20 Fig. 18 I then crimp the stops again, replace the archwires and tie in again. I repeat this process until I have room for the blocked out tooth. A trick in this system: in order to direct the force more to the blocked out tooth, I power chain from the molars to the two teeth adjacent by the blocked out tooth. As the space opens up, I simply direct all of the extra arch perimeter to the blocked out tooth by bracketing the tooth and tying to the archwire with floss. Figs. 1–10 show the process of placing the stops on the archwire, moving the stops distally to attain extra arch perimeter, securing the stops with a Weingardt Plier; and pictures of a blocked out tooth being brought into the arch by this method. I employed this technique on the following patient recently and just finished the case. The patient was a 35-year-old Caucasian (Figs. 11-13) when treatment was begun in March 2012. The patient was Class I dentally and skeletally, Mesocephalic, and obviously exhibited no future growth issues. I began by bracket-ing the teeth, banding the first molars, placing .012 Nitinol, and placing separators for the sevens (Fig. 14). The patient had extremely tight contacts and her arches were wide. I therefore opted not to band the second molars. I placed a .014 Nitinol in April 2012 (Fig 15). In May, I placed a .018 Nitinol archwire (Fig 16). On June 26, 2012, I placed the Braid Eight in the manner described above. Figs.17 and 18 show the excess wire deflected toward the blocked out UL3 and www.orthodontics.com Winter 2014 13 one time, I place the stops such that they are crimped onto the Braid Eight archwire so that they create one to two additional mm of arch perimeter in the archwire when crimped. The stops touch the buccal tubes of the bands, but cannot slide. I have created a closed system. I purchase the crimpable rectangular stops from Class One Orthodontics. They are a solid, rectangular, .021 x .025, and there is an offset hook on one side. This is for an elastomeric ligature to be placed from the offset hook (which is placed in a mesial direction) to the distal molar hook if the second molar is not present. This way, the patient cannot disengage the wire out of the tube. I then tie in the wire into the brackets as best I can. As the perimeter of the archwire is more than the actual arch perimeter, the archwire is going to have to flex occlusally, gingivally, and buccally. But it creates arch expansion/alveolar remodeling all over the arch at one time. After a month, I have achieved some arch development. I remove the archwire and loosen the crimp in the stops, and slide them another mm distally.
Journal of the American Orthodontic Society Winter 2014: Page 13