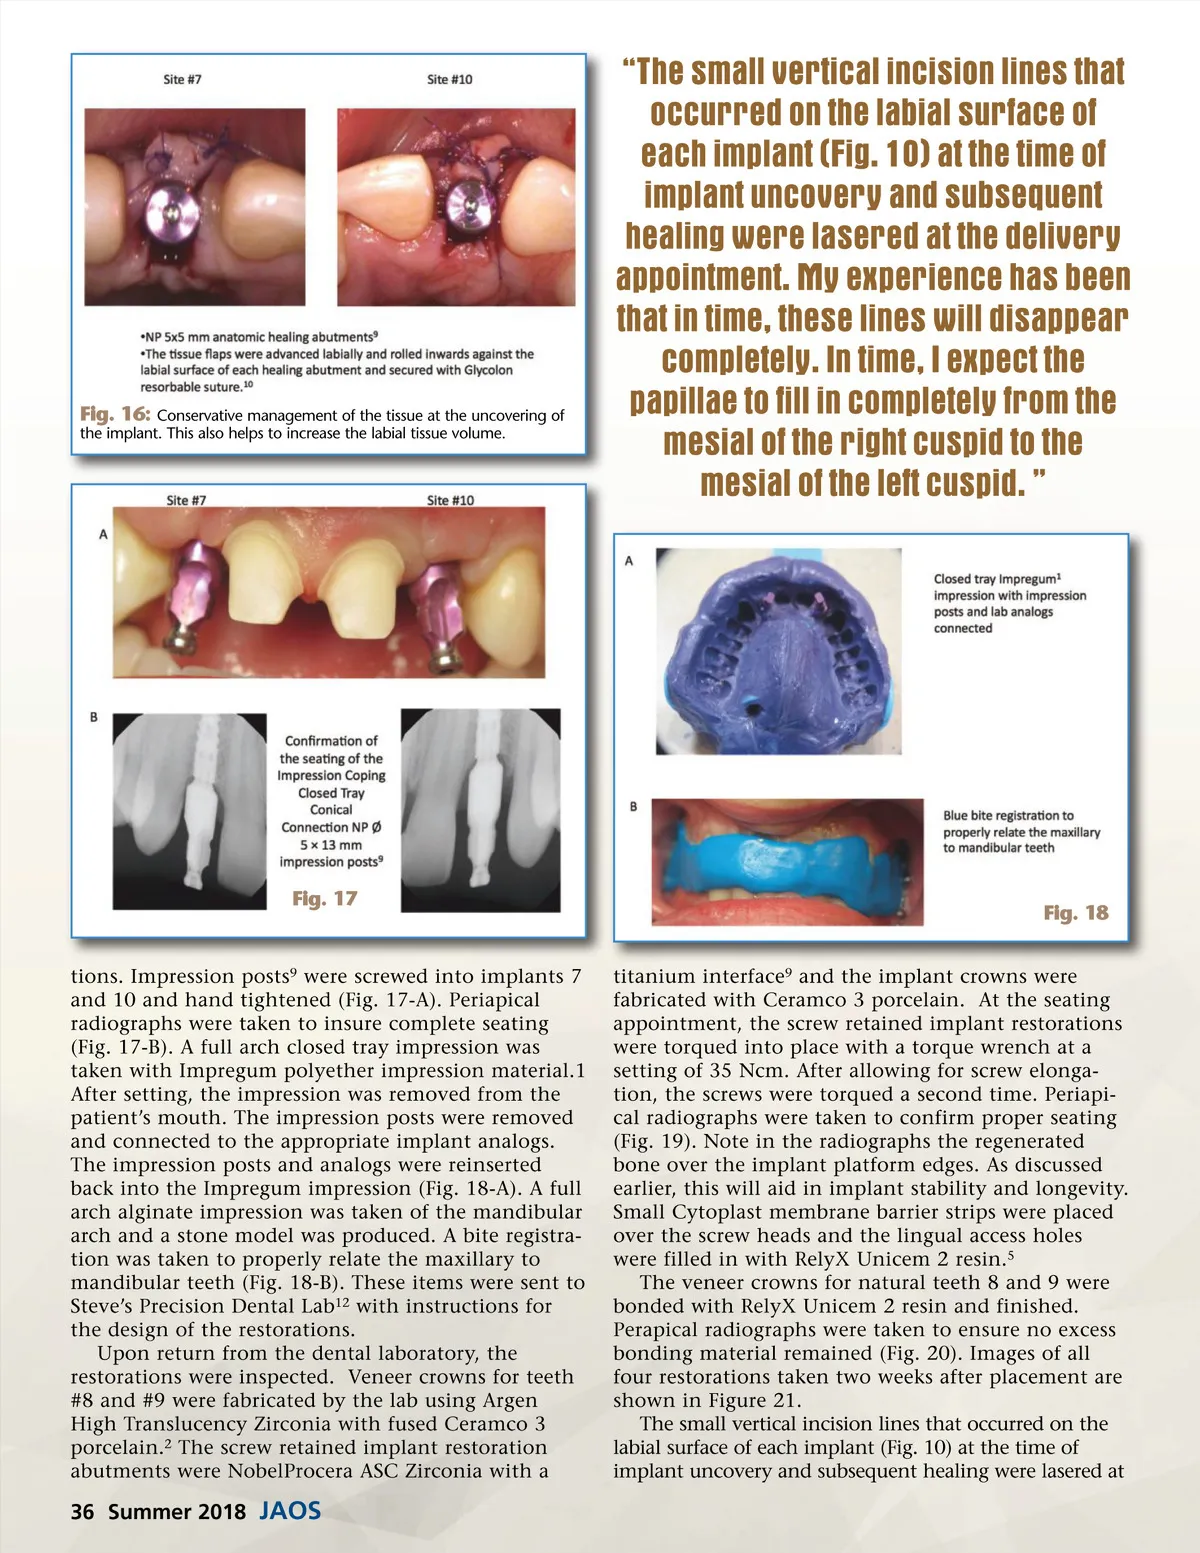
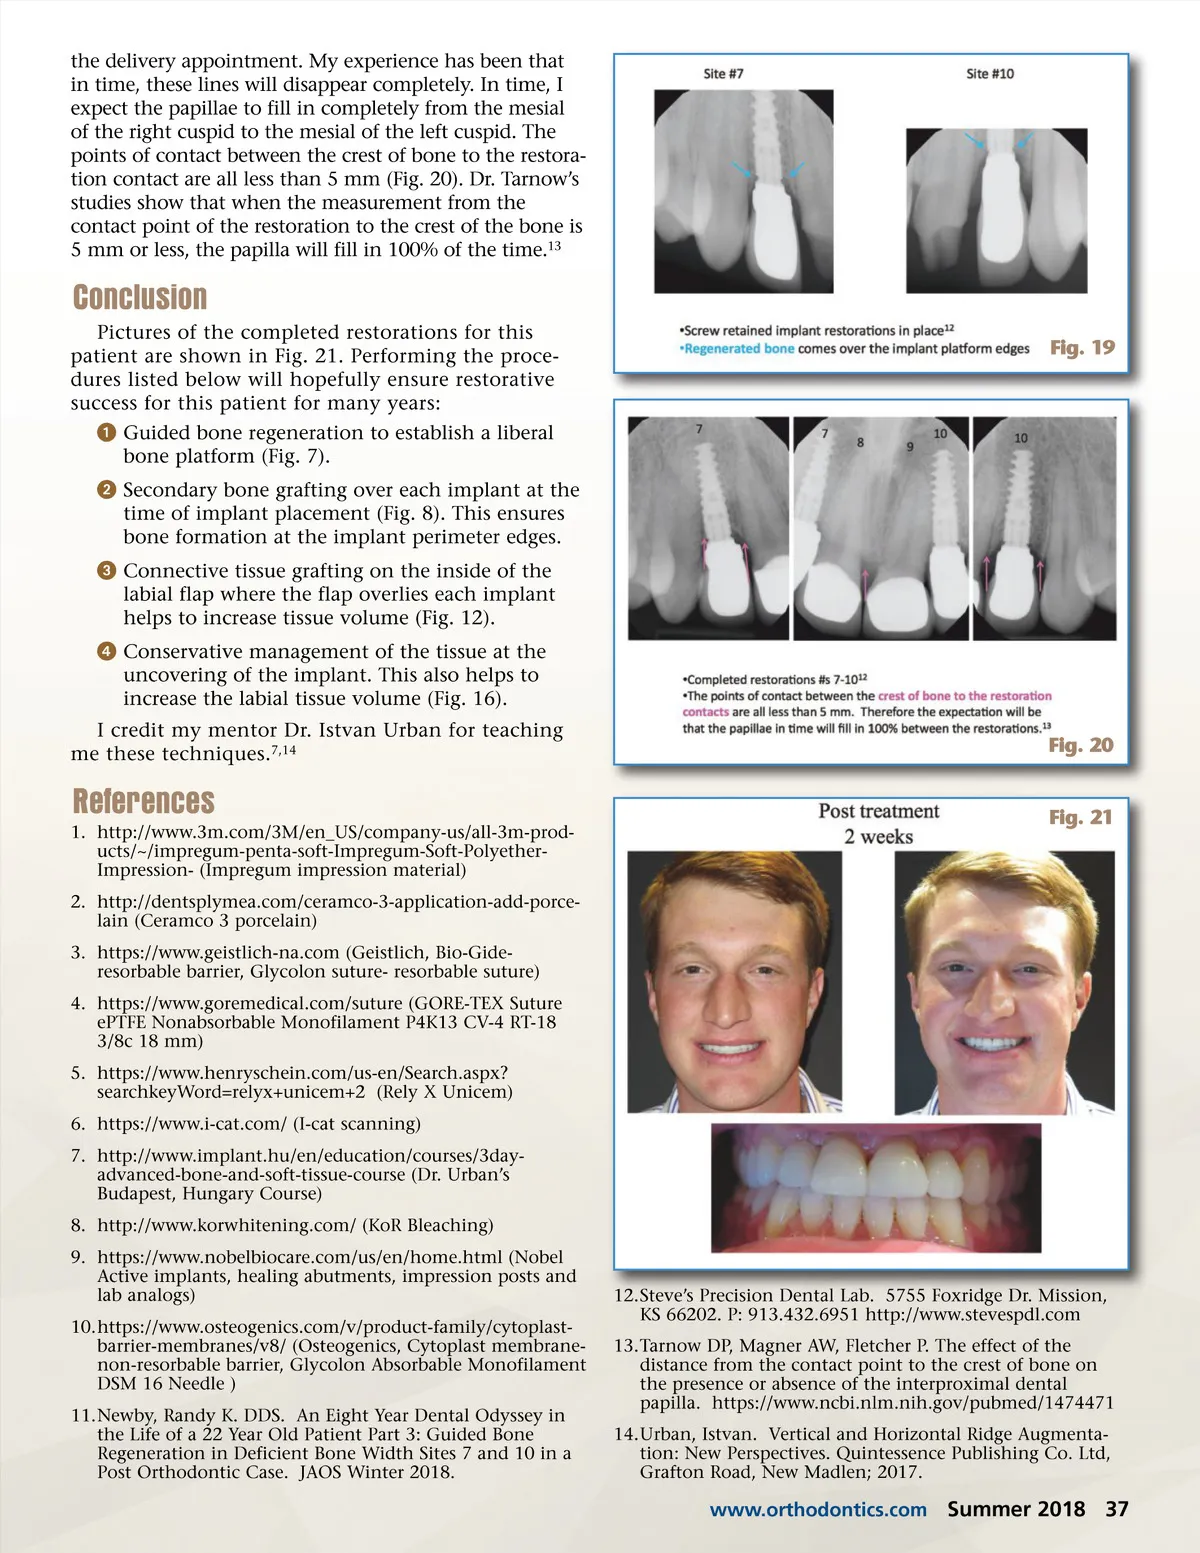
Fig. 16: Conservative management of the tissue at the uncovering of the implant. This also helps to increase the labial tissue volume. “The small vertical incision lines that occurred on the labial surface of each implant (Fig. 10) at the time of implant uncovery and subsequent healing were lasered at the delivery appointment. My experience has been that in time, these lines will disappear completely. In time, I expect the papillae to fill in completely from the mesial of the right cuspid to the mesial of the left cuspid. ” Fig. 17 Fig. 18 titanium interface 9 and the implant crowns were fabricated with Ceramco 3 porcelain. At the seating appointment, the screw retained implant restorations were torqued into place with a torque wrench at a setting of 35 Ncm. After allowing for screw elonga-tion, the screws were torqued a second time. Periapi-cal radiographs were taken to confirm proper seating (Fig. 19). Note in the radiographs the regenerated bone over the implant platform edges. As discussed earlier, this will aid in implant stability and longevity. Small Cytoplast membrane barrier strips were placed over the screw heads and the lingual access holes were filled in with RelyX Unicem 2 resin. 5 The veneer crowns for natural teeth 8 and 9 were bonded with RelyX Unicem 2 resin and finished. Perapical radiographs were taken to ensure no excess bonding material remained (Fig. 20). Images of all four restorations taken two weeks after placement are shown in Figure 21. The small vertical incision lines that occurred on the labial surface of each implant (Fig. 10) at the time of implant uncovery and subsequent healing were lasered at tions. Impression posts 9 were screwed into implants 7 and 10 and hand tightened (Fig. 17-A). Periapical radiographs were taken to insure complete seating (Fig. 17-B). A full arch closed tray impression was taken with Impregum polyether impression material.1 After setting, the impression was removed from the patient’s mouth. The impression posts were removed and connected to the appropriate implant analogs. The impression posts and analogs were reinserted back into the Impregum impression (Fig. 18-A). A full arch alginate impression was taken of the mandibular arch and a stone model was produced. A bite registra-tion was taken to properly relate the maxillary to mandibular teeth (Fig. 18-B). These items were sent to Steve’s Precision Dental Lab 12 with instructions for the design of the restorations. Upon return from the dental laboratory, the restorations were inspected. Veneer crowns for teeth #8 and #9 were fabricated by the lab using Argen High Translucency Zirconia with fused Ceramco 3 porcelain. 2 The screw retained implant restoration abutments were NobelProcera ASC Zirconia with a 36 Summer 2018 JAOS
Journal of the American Orthodontic Society Summer 2018/Buyer's Guide: Page 36