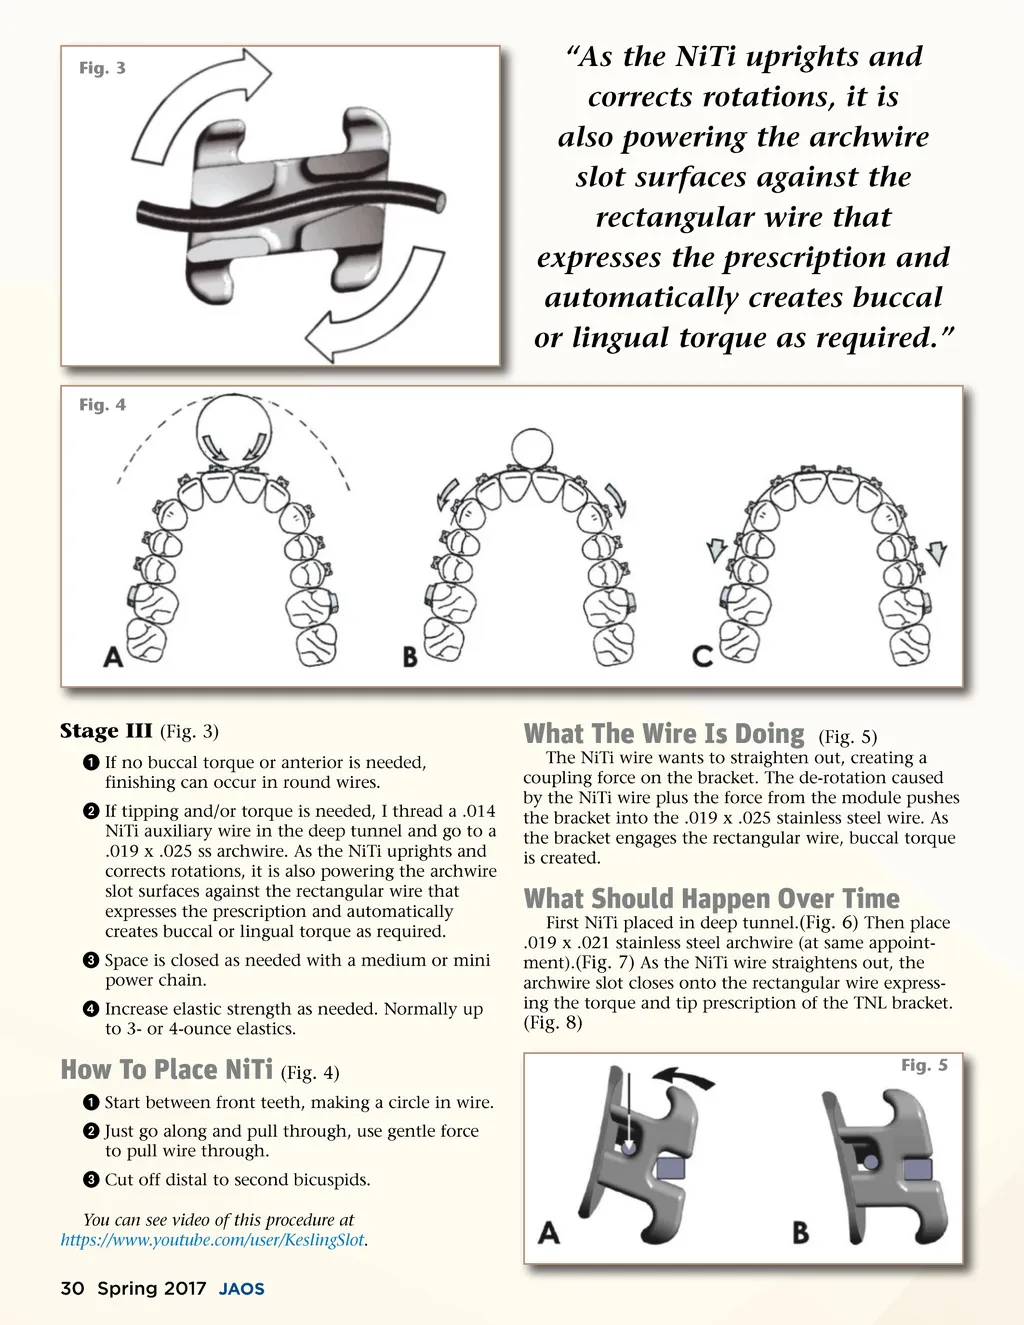
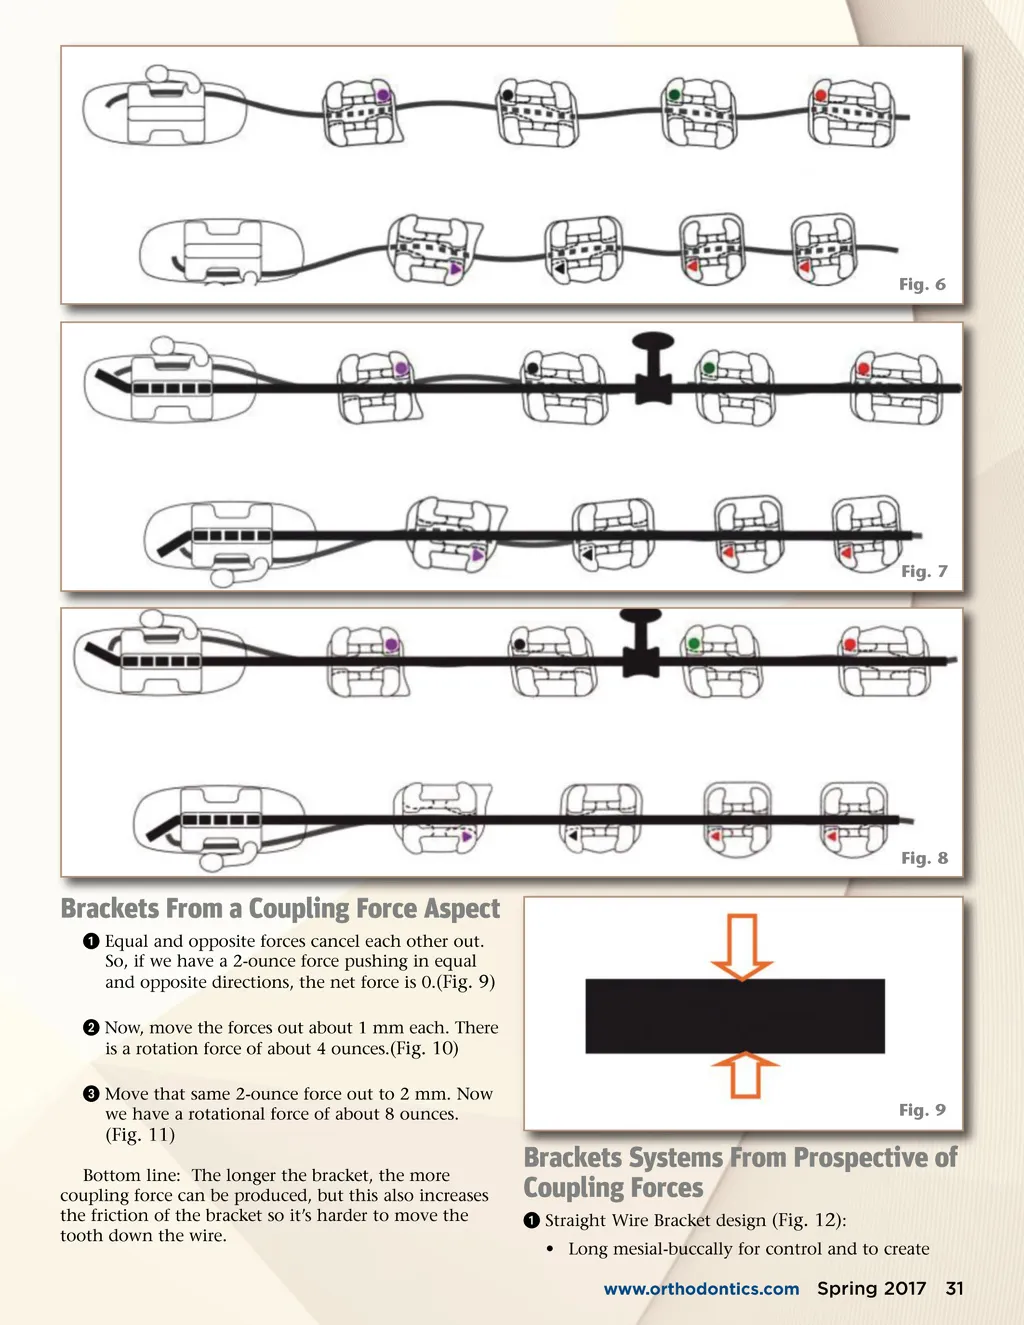
Fig. 3 “As the NiTi uprights and corrects rotations, it is also powering the archwire slot surfaces against the rectangular wire that expresses the prescription and automatically creates buccal or lingual torque as required.” Fig. 4 Stage III (Fig. 3) ᕡ If no buccal torque or anterior is needed, finishing can occur in round wires. ᕢ If tipping and/or torque is needed, I thread a .014 NiTi auxiliary wire in the deep tunnel and go to a .019 x .025 ss archwire. As the NiTi uprights and corrects rotations, it is also powering the archwire slot surfaces against the rectangular wire that expresses the prescription and automatically creates buccal or lingual torque as required. ᕣ Space is closed as needed with a medium or mini power chain. ᕤ Increase elastic strength as needed. Normally up to 3-or 4-ounce elastics. What The Wire Is Doing (Fig. 5) The NiTi wire wants to straighten out, creating a coupling force on the bracket. The de-rotation caused by the NiTi wire plus the force from the module pushes the bracket into the .019 x .025 stainless steel wire. As the bracket engages the rectangular wire, buccal torque is created. What Should Happen Over Time First NiTi placed in deep tunnel. (Fig. 6) Then place .019 x .021 stainless steel archwire (at same appoint-ment). (Fig. 7) As the NiTi wire straightens out, the archwire slot closes onto the rectangular wire express-ing the torque and tip prescription of the TNL bracket. (Fig. 8) Fig. 5 How To Place NiTi (Fig. 4) ᕡ Start between front teeth, making a circle in wire. ᕢ Just go along and pull through, use gentle force to pull wire through. ᕣ Cut off distal to second bicuspids. You can see video of this procedure at https://www.youtube.com/user/KeslingSlot . 30 Spring 2017 JAOS
Journal of the American Orthodontic Society Spring 2017: Page 30