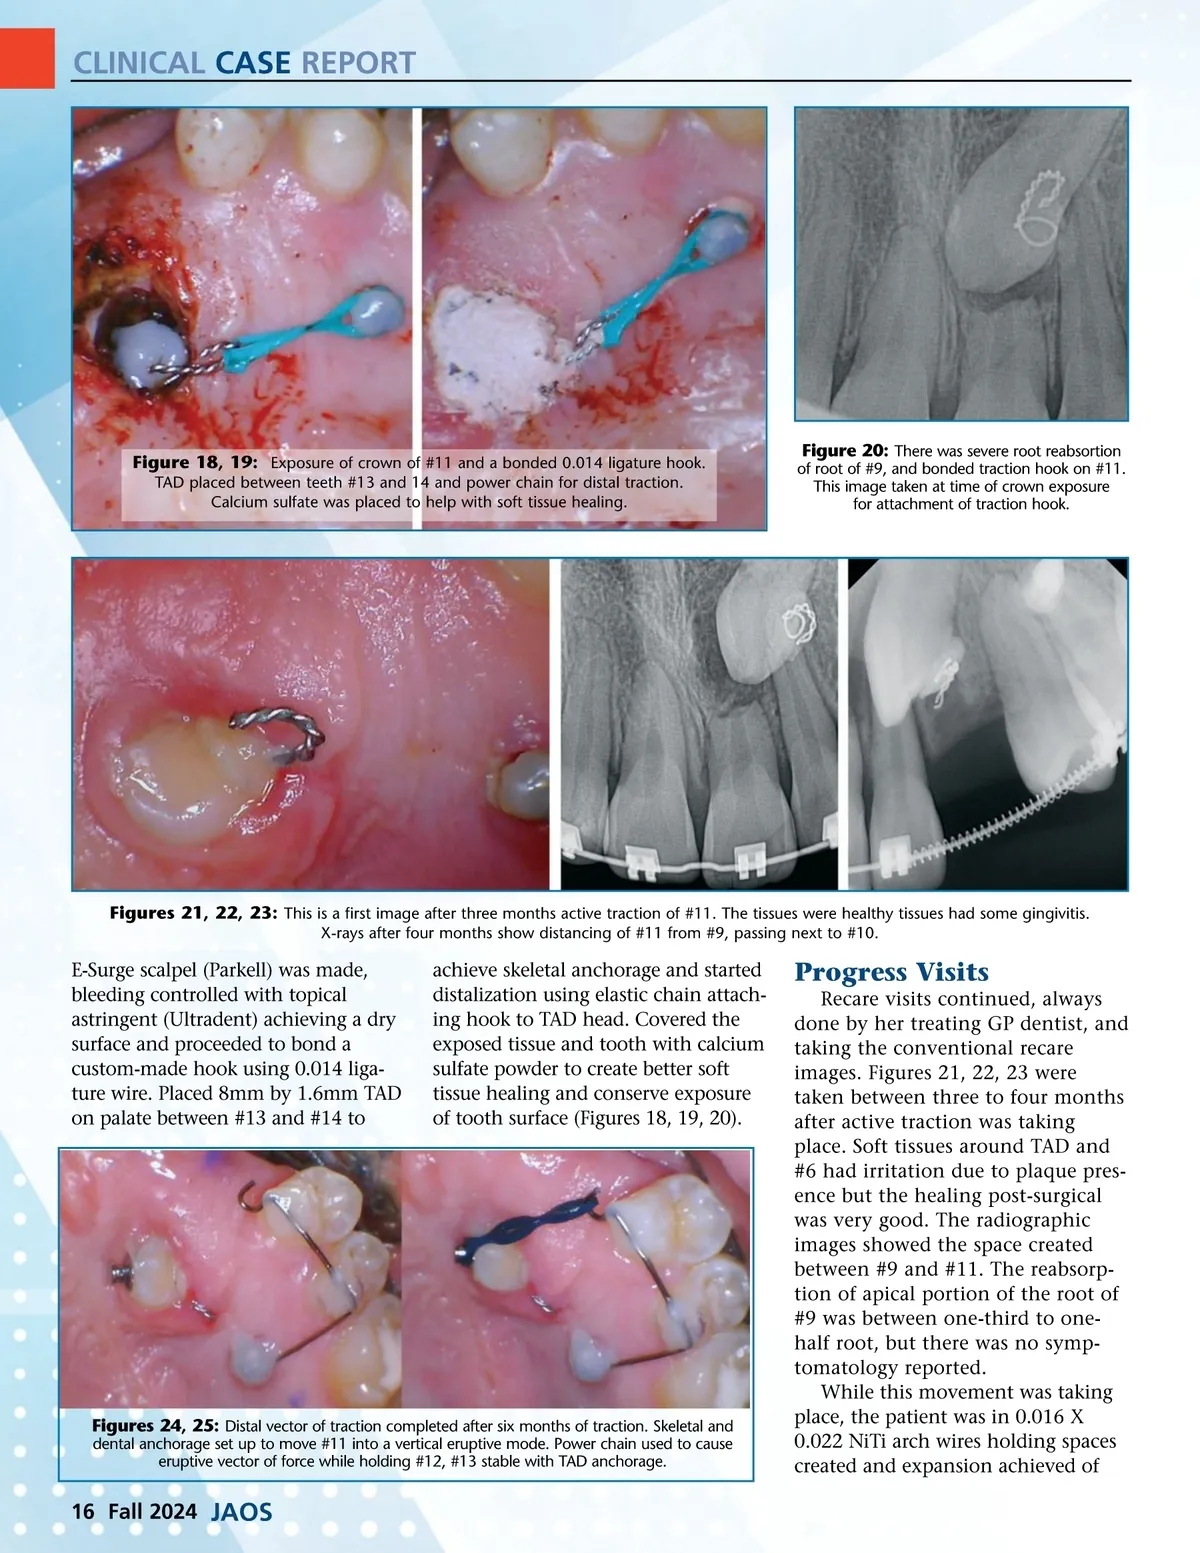
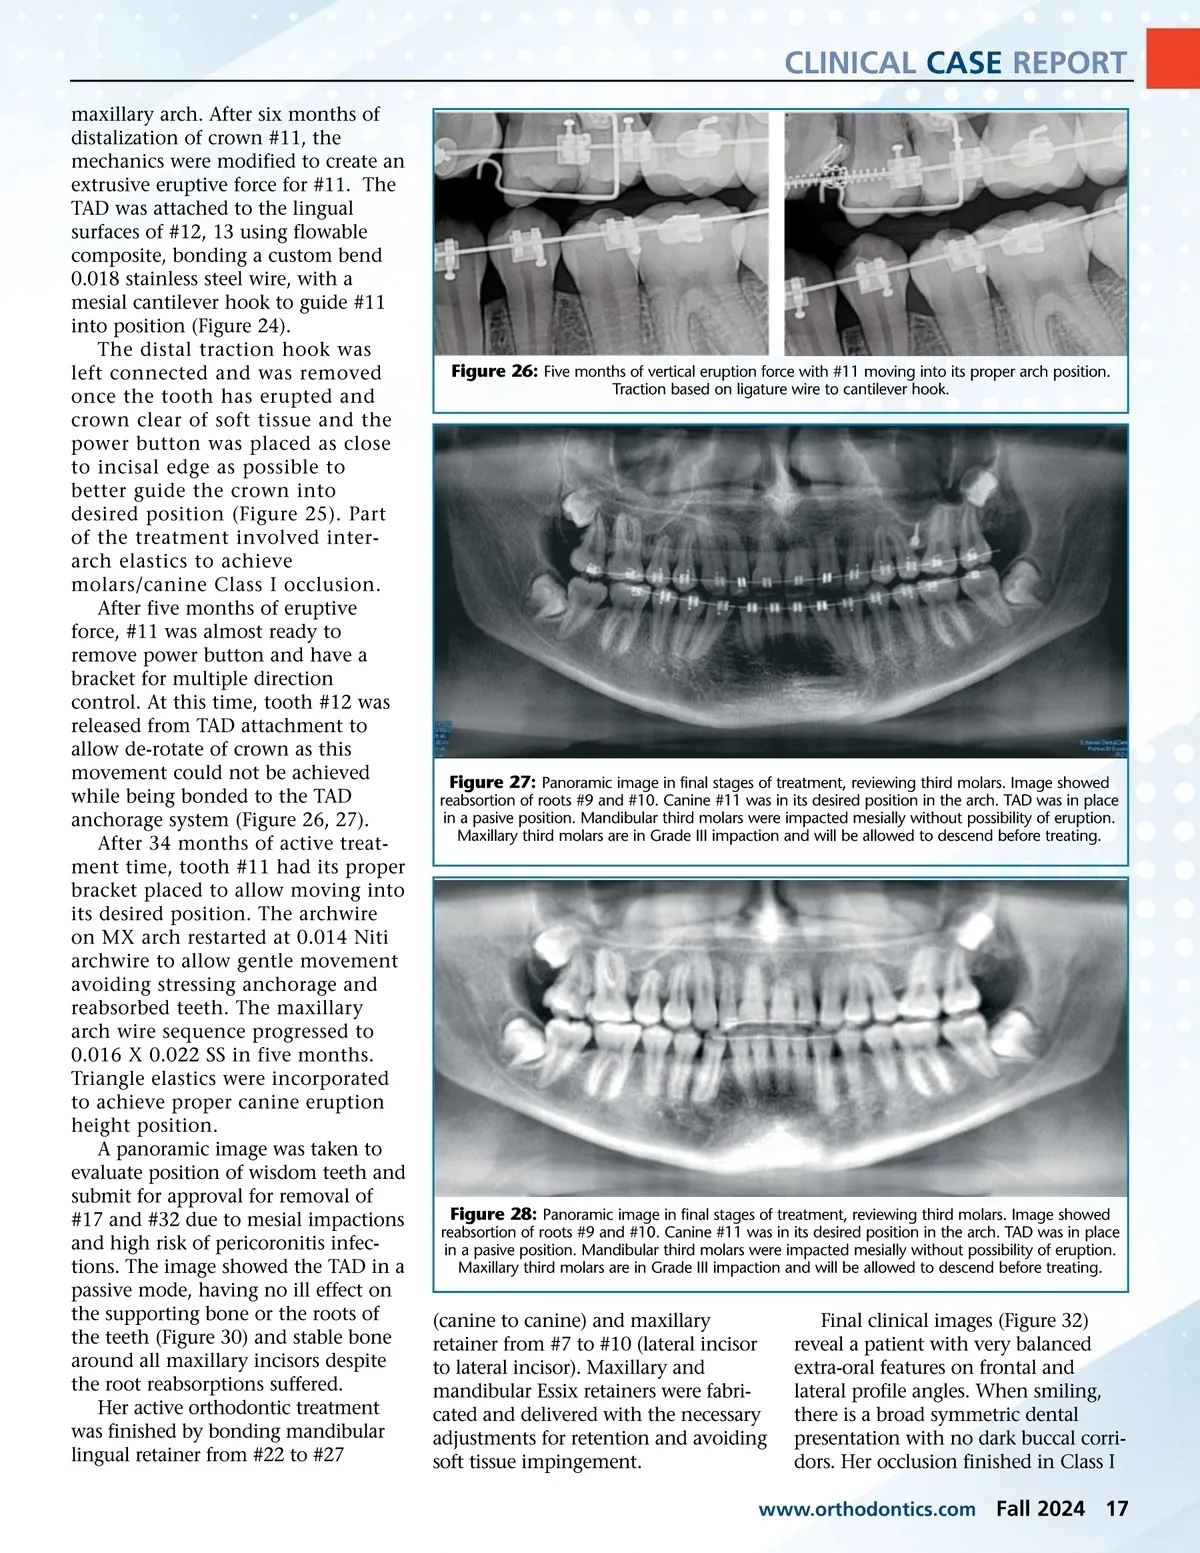
CLINICAL CASE REPORT maxillary arch. After six months of distalization of crown #11, the mechanics were modified to create an extrusive eruptive force for #11. The TAD was attached to the lingual surfaces of #12, 13 using flowable composite, bonding a custom bend 0.018 stainless steel wire, with a mesial cantilever hook to guide #11 into position (Figure 24). The distal traction hook was left connected and was removed once the tooth has erupted and crown clear of soft tissue and the power button was placed as close to incisal edge as possible to better guide the crown into desired position (Figure 25). Part of the treatment involved inter-arch elastics to achieve molars/canine Class I occlusion. After five months of eruptive force, #11 was almost ready to remove power button and have a bracket for multiple direction control. At this time, tooth #12 was released from TAD attachment to allow de-rotate of crown as this movement could not be achieved while being bonded to the TAD anchorage system (Figure 26, 27). After 34 months of active treat-ment time, tooth #11 had its proper bracket placed to allow moving into its desired position. The archwire on MX arch restarted at 0.014 Niti archwire to allow gentle movement avoiding stressing anchorage and reabsorbed teeth. The maxillary arch wire sequence progressed to 0.016 X 0.022 SS in five months. Triangle elastics were incorporated to achieve proper canine eruption height position. A panoramic image was taken to evaluate position of wisdom teeth and submit for approval for removal of #17 and #32 due to mesial impactions and high risk of pericoronitis infec-tions. The image showed the TAD in a passive mode, having no ill effect on the supporting bone or the roots of the teeth (Figure 30) and stable bone around all maxillary incisors despite the root reabsorptions suffered. Her active orthodontic treatment was finished by bonding mandibular lingual retainer from #22 to #27 Figure 26: Five months of vertical eruption force with #11 moving into its proper arch position. Traction based on ligature wire to cantilever hook. Figure 27: Panoramic image in final stages of treatment, reviewing third molars. Image showed reabsortion of roots #9 and #10. Canine #11 was in its desired position in the arch. TAD was in place in a pasive position. Mandibular third molars were impacted mesially without possibility of eruption. Maxillary third molars are in Grade III impaction and will be allowed to descend before treating. Figure 28: Panoramic image in final stages of treatment, reviewing third molars. Image showed reabsortion of roots #9 and #10. Canine #11 was in its desired position in the arch. TAD was in place in a pasive position. Mandibular third molars were impacted mesially without possibility of eruption. Maxillary third molars are in Grade III impaction and will be allowed to descend before treating. (canine to canine) and maxillary retainer from #7 to #10 (lateral incisor to lateral incisor). Maxillary and mandibular Essix retainers were fabri-cated and delivered with the necessary adjustments for retention and avoiding soft tissue impingement. Final clinical images (Figure 32) reveal a patient with very balanced extra-oral features on frontal and lateral profile angles. When smiling, there is a broad symmetric dental presentation with no dark buccal corri-dors. Her occlusion finished in Class I www.orthodontics.com Fall 2024 17
Journal of the American Orthodontic Society Fall 2024: Page 17