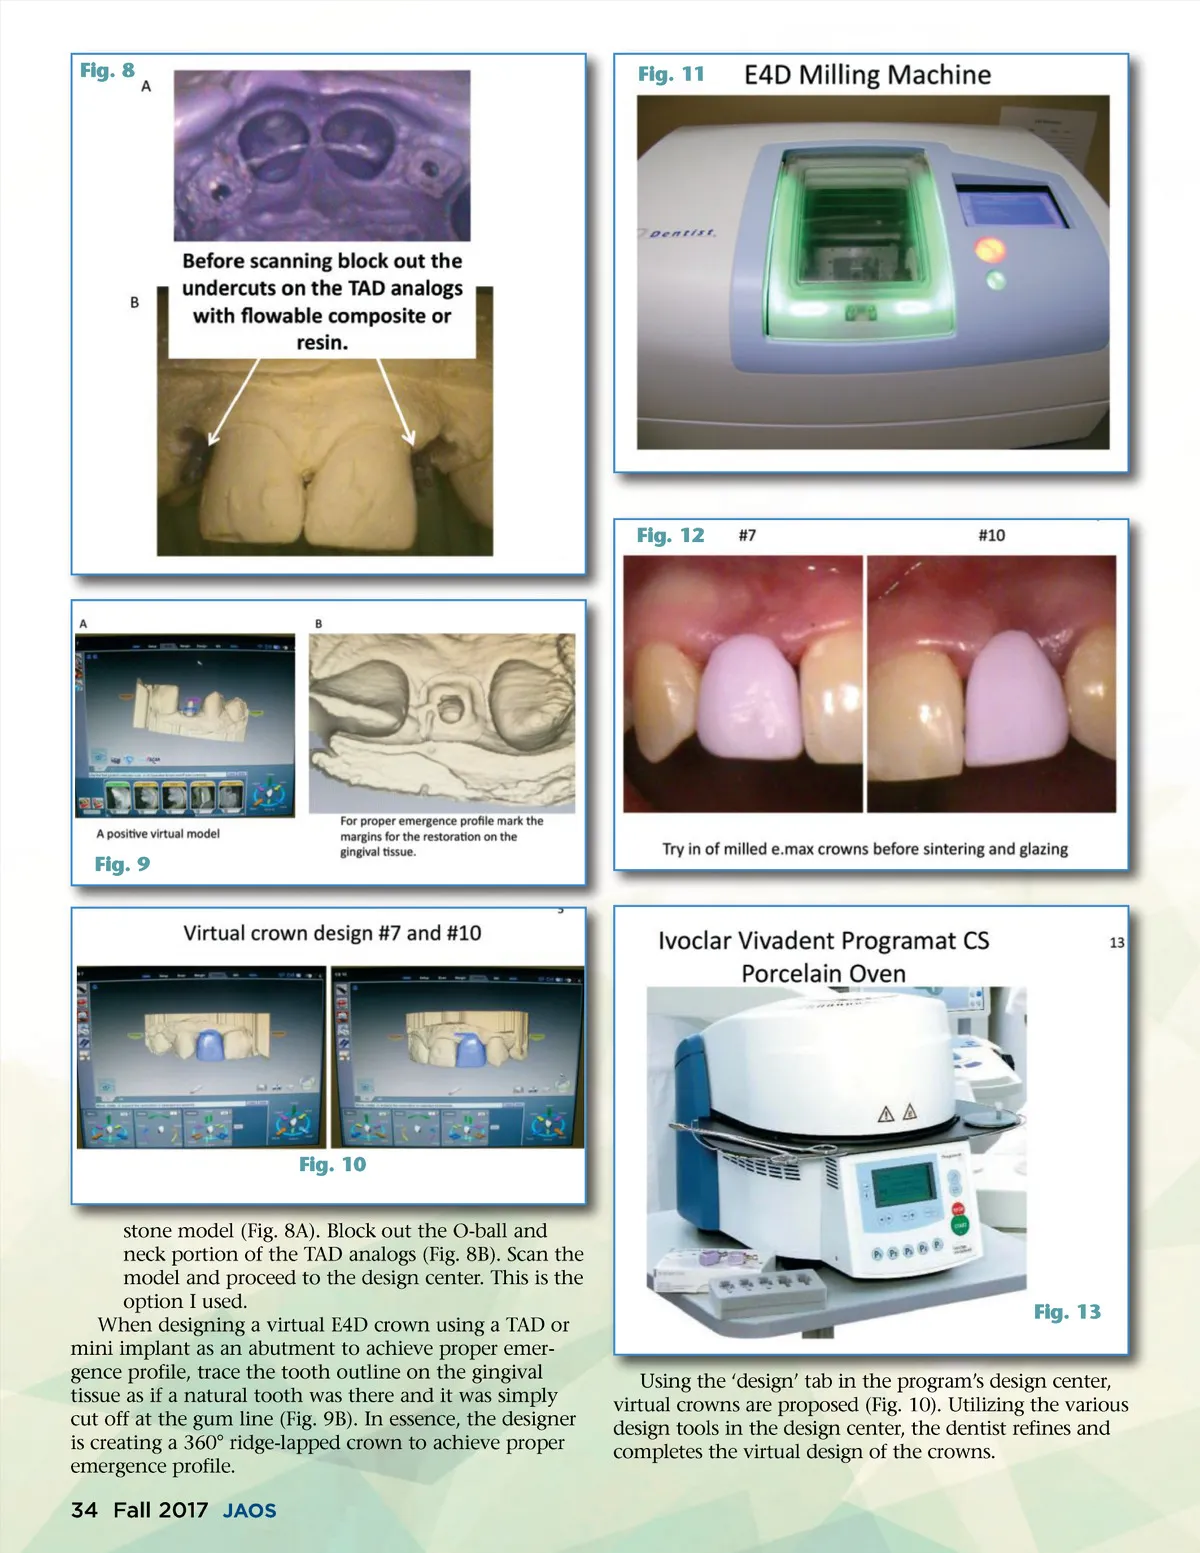
“The dentist may or may not cement the provisional composite crown onto the TAD as it will snap onto the TAD if left uncemented. My preference would be to cement the provisional composite crown onto the TAD.” Virtual Designed Crowns, Sintering, Glazing and Bonding of the Completed Provisional Restorations After the e.max crowns were milled using the in-office E4D milling machine (Fig. 11), they were tried in on the TADs. Precise fit on the TADs, proper crown contour, emergence from the soft tissue, contacts and occlusion were checked (Fig.12). The crowns were sintered and glazed in the Ivoclar Vivadent Programat CS porcelain oven (Fig. 13). 13 After cooling to room temperature the internal surfaces of the crowns were etched and then bonded onto the TADs with RelyX Unicem 2 Automix resin. 11 During bonding, a rubber dam barrier (Fig. 14) was used to prevent any resin flowing below the gum line around the TAD collar. The finished provisional porcelain crowns are shown in Figs. 15 and 16. As discussed previ-Fig. 14 ously, the provisional crowns internally rest on the top flat portion of the TADs (Fig. 17). This design eliminates the risk of gingival displacement of the provi-sional crowns. The porcelain internally fits against the top portion of the square head of the TAD (Fig. 17). This provides an anti-rotation component to the restoration. Fig. 16 Fig. 17 Fig. 18 Fig. 15 www.orthodontics.com Fall 2017 35
Journal of the American Orthodontic Society Fall 2017: Page 35