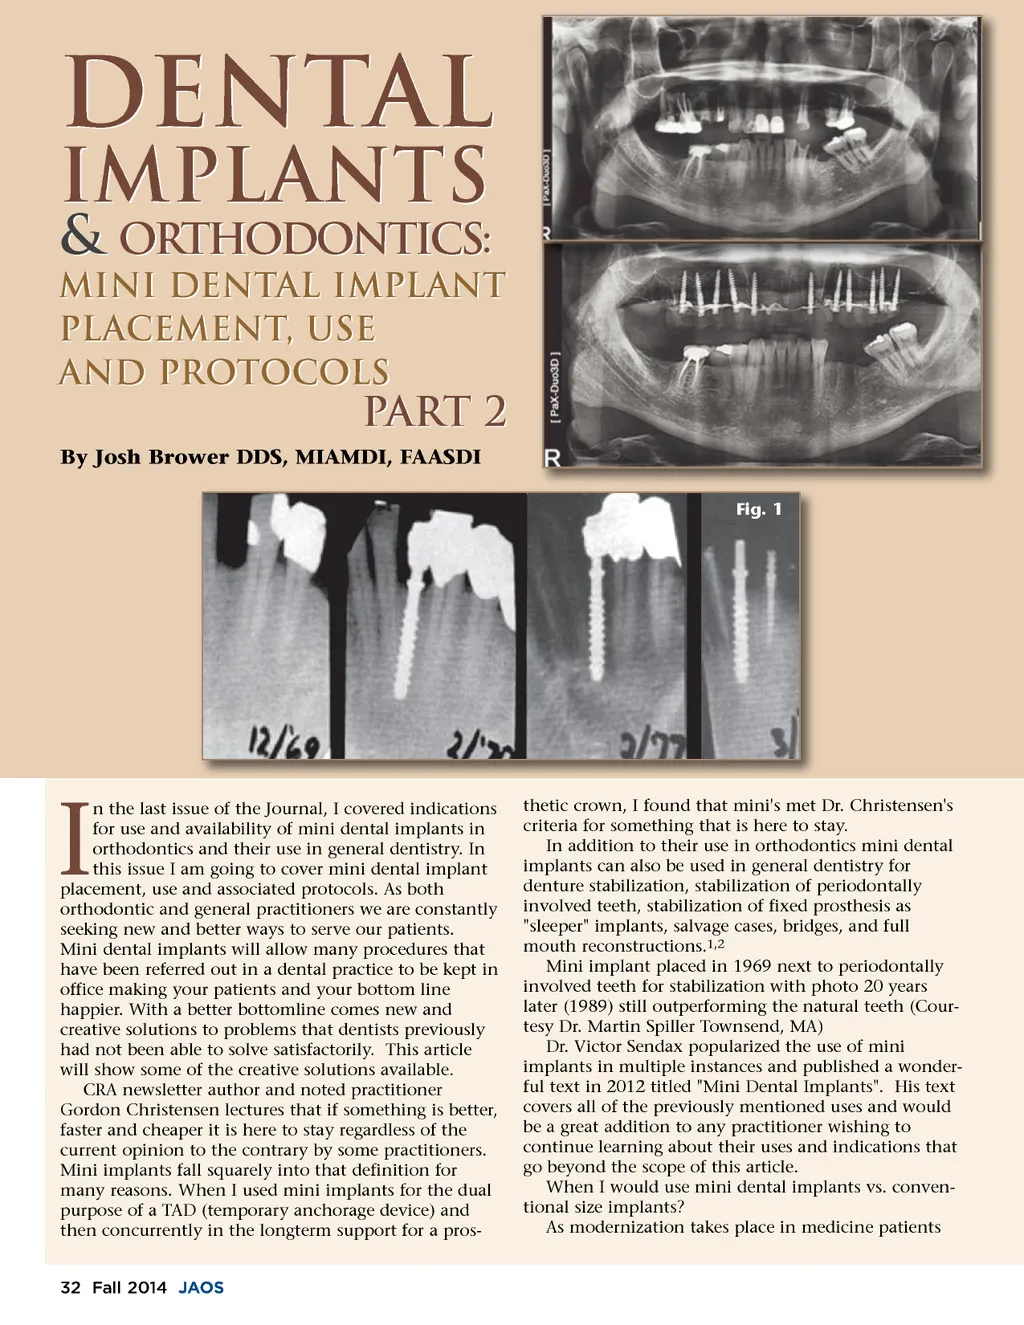
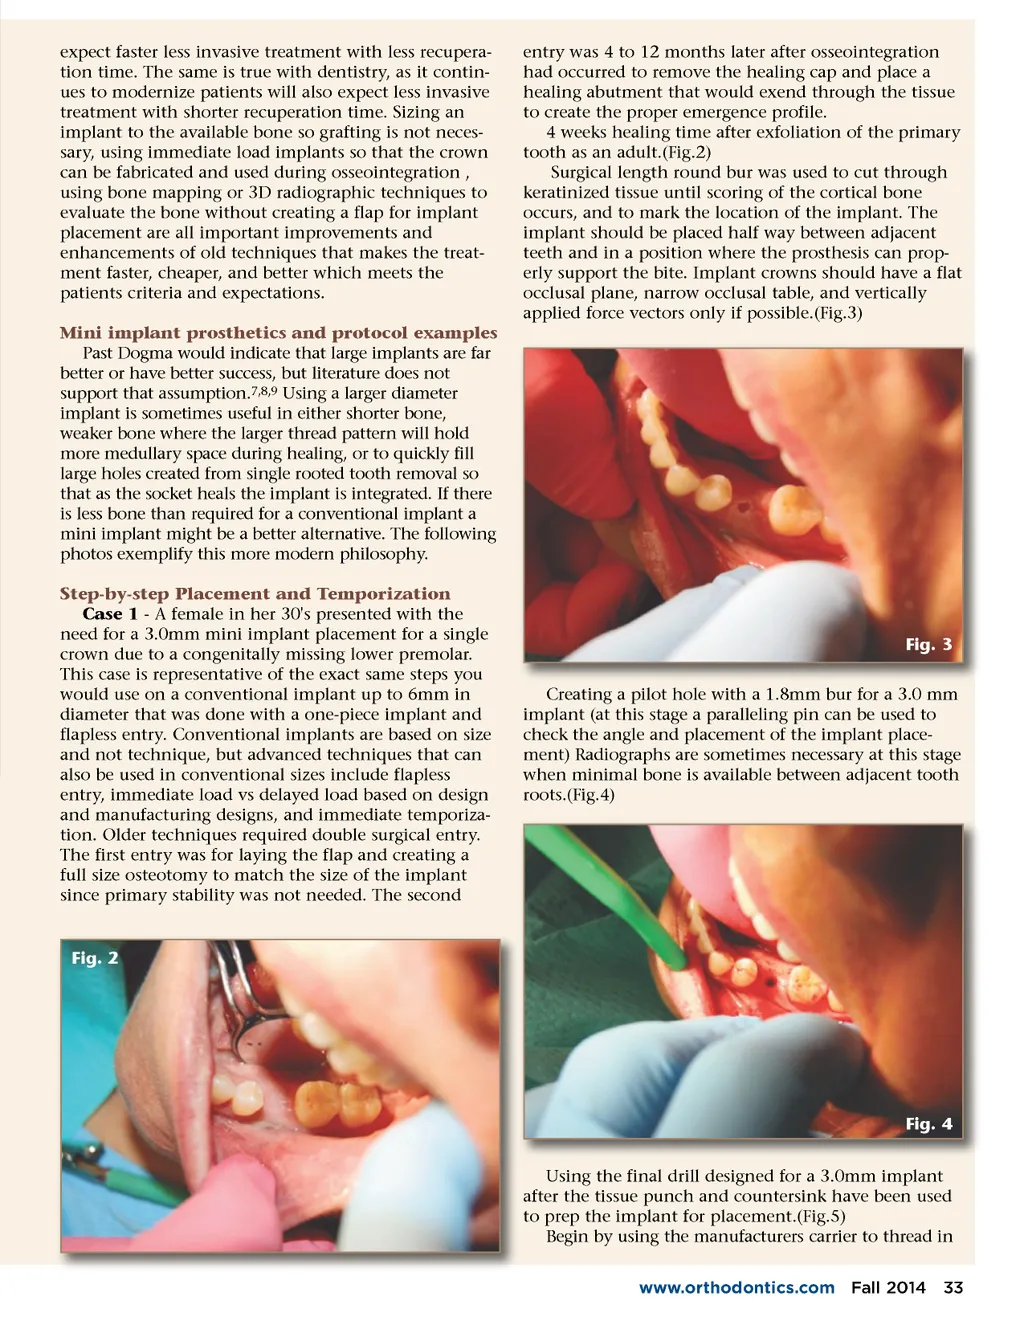
expect faster less invasive treatment with less recupera-tion time. The same is true with dentistry, as it contin-ues to modernize patients will also expect less invasive treatment with shorter recuperation time. Sizing an implant to the available bone so grafting is not neces-sary, using immediate load implants so that the crown can be fabricated and used during osseointegration , using bone mapping or 3D radiographic techniques to evaluate the bone without creating a flap for implant placement are all important improvements and enhancements of old techniques that makes the treat-ment faster, cheaper, and better which meets the patients criteria and expectations. Mini implant prosthetics and protocol examples Past Dogma would indicate that large implants are far better or have better success, but literature does not support that assumption. 7,8,9 Using a larger diameter implant is sometimes useful in either shorter bone, weaker bone where the larger thread pattern will hold more medullary space during healing, or to quickly fill large holes created from single rooted tooth removal so that as the socket heals the implant is integrated. If there is less bone than required for a conventional implant a mini implant might be a better alternative. The following photos exemplify this more modern philosophy. Step-by-step Placement and Temporization Case 1 -A female in her 30's presented with the need for a 3.0mm mini implant placement for a single crown due to a congenitally missing lower premolar. This case is representative of the exact same steps you would use on a conventional implant up to 6mm in diameter that was done with a one-piece implant and flapless entry. Conventional implants are based on size and not technique, but advanced techniques that can also be used in conventional sizes include flapless entry, immediate load vs delayed load based on design and manufacturing designs, and immediate temporiza-tion. Older techniques required double surgical entry. The first entry was for laying the flap and creating a full size osteotomy to match the size of the implant since primary stability was not needed. The second entry was 4 to 12 months later after osseointegration had occurred to remove the healing cap and place a healing abutment that would exend through the tissue to create the proper emergence profile. 4 weeks healing time after exfoliation of the primary tooth as an adult.(Fig.2) Surgical length round bur was used to cut through keratinized tissue until scoring of the cortical bone occurs, and to mark the location of the implant. The implant should be placed half way between adjacent teeth and in a position where the prosthesis can prop-erly support the bite. Implant crowns should have a flat occlusal plane, narrow occlusal table, and vertically applied force vectors only if possible.(Fig.3) Fig. 3 Creating a pilot hole with a 1.8mm bur for a 3.0 mm implant (at this stage a paralleling pin can be used to check the angle and placement of the implant place-ment) Radiographs are sometimes necessary at this stage when minimal bone is available between adjacent tooth roots.(Fig.4) Fig. 2 Fig. 4 Using the final drill designed for a 3.0mm implant after the tissue punch and countersink have been used to prep the implant for placement.(Fig.5) Begin by using the manufacturers carrier to thread in www.orthodontics.com Fall 2014 33
Journal of the American Orthodontic Society Fall 2014: Page 33