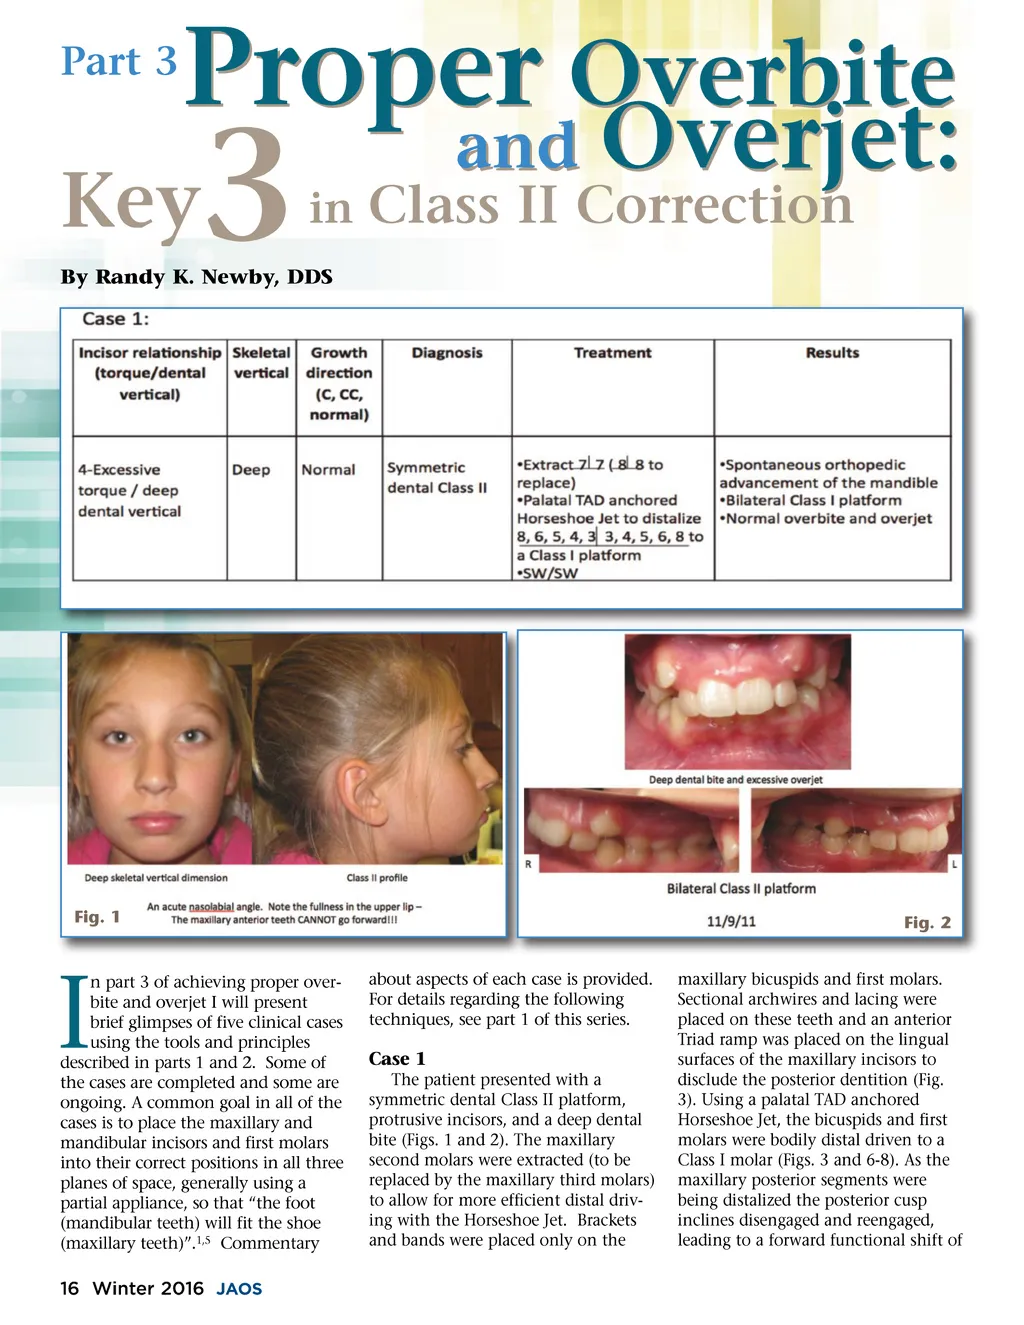
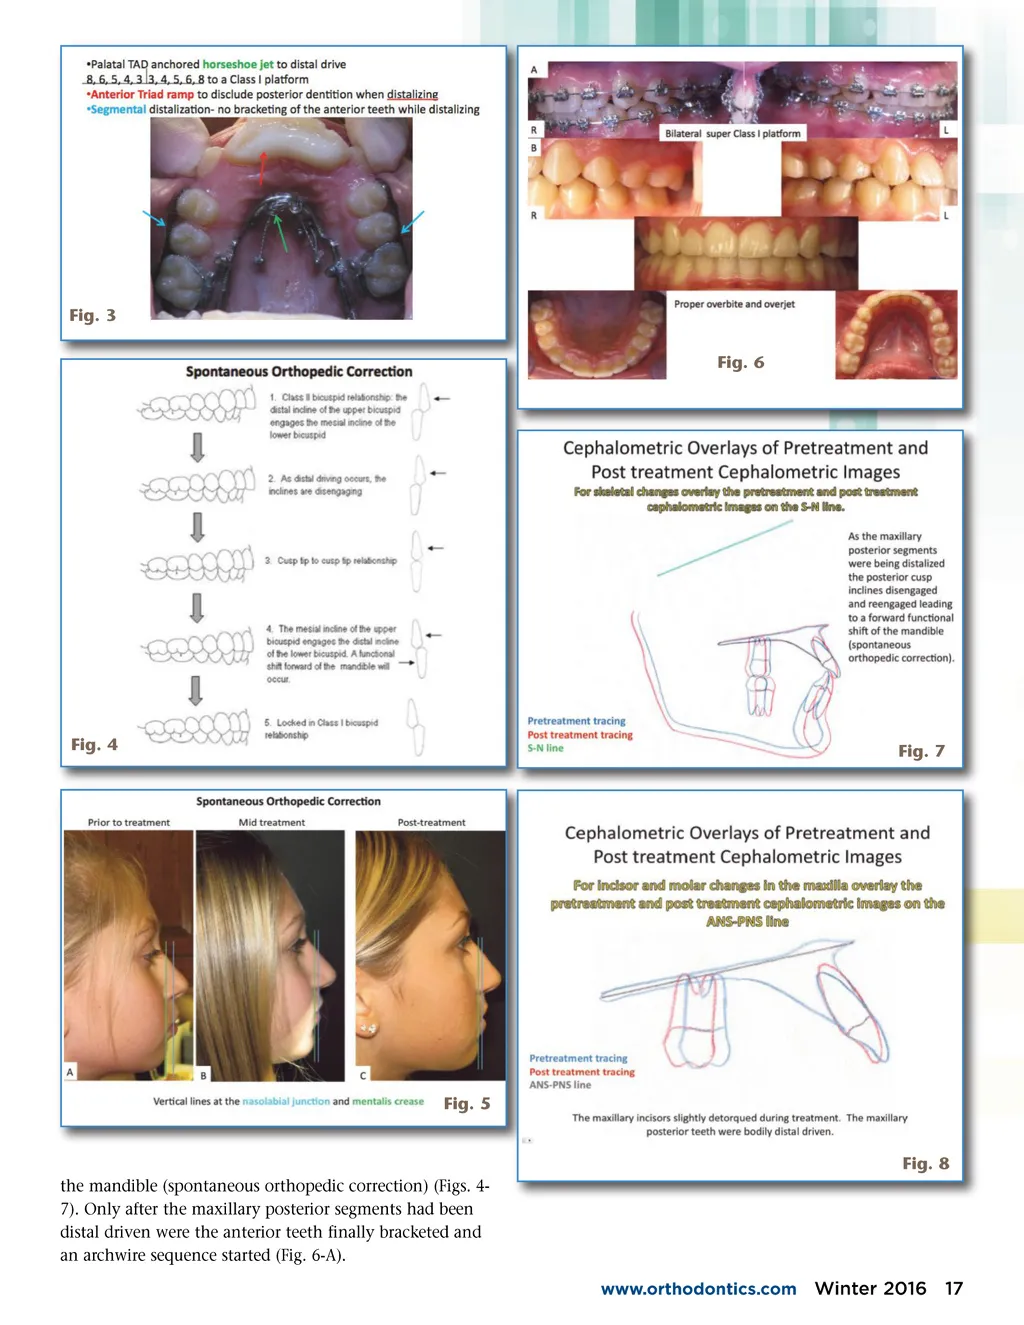
Part 3 Proper Overbite Key By Randy K. Newby, DDS 3 in Class II Correction and Overjet: Fig. 1 Fig. 2 about aspects of each case is provided. For details regarding the following techniques, see part 1 of this series. maxillary bicuspids and first molars. Sectional archwires and lacing were placed on these teeth and an anterior Triad ramp was placed on the lingual surfaces of the maxillary incisors to disclude the posterior dentition (Fig. 3). Using a palatal TAD anchored Horseshoe Jet, the bicuspids and first molars were bodily distal driven to a Class I molar (Figs. 3 and 6-8). As the maxillary posterior segments were being distalized the posterior cusp inclines disengaged and reengaged, leading to a forward functional shift of I n part 3 of achieving proper over-bite and overjet I will present brief glimpses of five clinical cases using the tools and principles described in parts 1 and 2. Some of the cases are completed and some are ongoing. A common goal in all of the cases is to place the maxillary and mandibular incisors and first molars into their correct positions in all three planes of space, generally using a partial appliance, so that “the foot (mandibular teeth) will fit the shoe (maxillary teeth)”. 1,5 Commentary Case 1 The patient presented with a symmetric dental Class II platform, protrusive incisors, and a deep dental bite (Figs. 1 and 2). The maxillary second molars were extracted (to be replaced by the maxillary third molars) to allow for more efficient distal driv-ing with the Horseshoe Jet. Brackets and bands were placed only on the 16 Winter 2016 JAOS
Journal of the American Orthodontic Society Winter 2016: Page 16