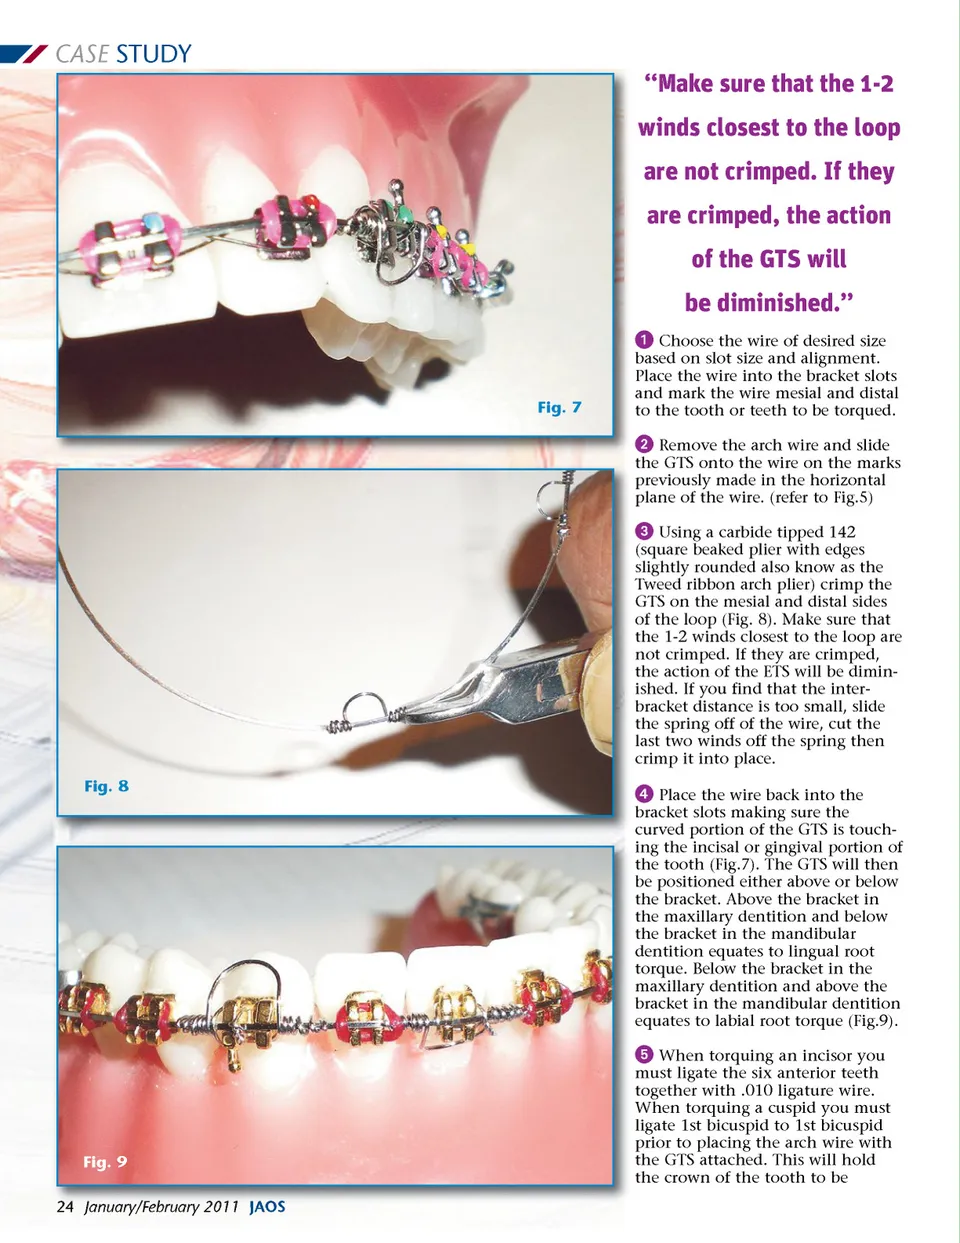
CASE STUDY “Make sure that the 1-2 winds closest to the loop are not crimped. If they are crimped, the action of the GTS will be diminished.” ᕡ Choose the wire of desired size based on slot size and alignment. Place the wire into the bracket slots and mark the wire mesial and distal to the tooth or teeth to be torqued. ᕢ Remove the arch wire and slide the GTS onto the wire on the marks previously made in the horizontal plane of the wire. (refer to Fig.5) ᕣ Using a carbide tipped 142 (square beaked plier with edges slightly rounded also know as the Tweed ribbon arch plier) crimp the GTS on the mesial and distal sides of the loop (Fig. 8). Make sure that the 1-2 winds closest to the loop are not crimped. If they are crimped, the action of the ETS will be dimin-ished. If you find that the inter-bracket distance is too small, slide the spring off of the wire, cut the last two winds off the spring then crimp it into place. Fig. 8 Fig. 7 ᕤ Place the wire back into the bracket slots making sure the curved portion of the GTS is touch-ing the incisal or gingival portion of the tooth (Fig.7). The GTS will then be positioned either above or below the bracket. Above the bracket in the maxillary dentition and below the bracket in the mandibular dentition equates to lingual root torque. Below the bracket in the maxillary dentition and above the bracket in the mandibular dentition equates to labial root torque (Fig.9). ᕥ When torquing an incisor you must ligate the six anterior teeth together with .010 ligature wire. When torquing a cuspid you must ligate 1st bicuspid to 1st bicuspid prior to placing the arch wire with the GTS attached. This will hold the crown of the tooth to be Fig. 9 24 January/February 2011 JAOS
Journal of the American Orthodontic Society January - February 2011: Page 24